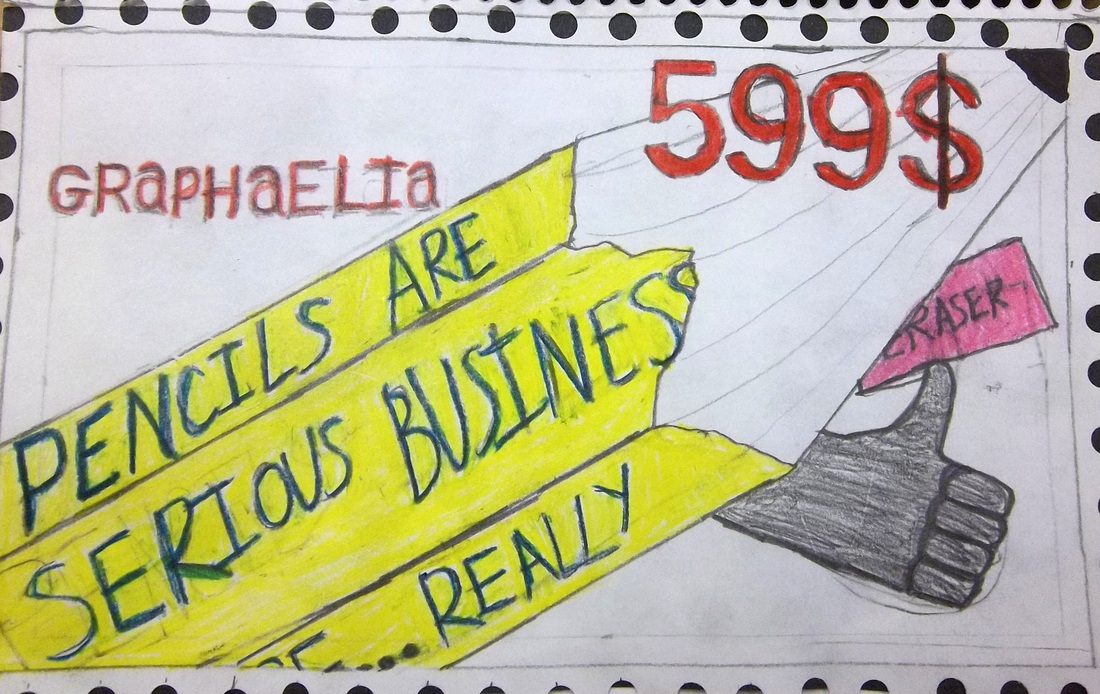
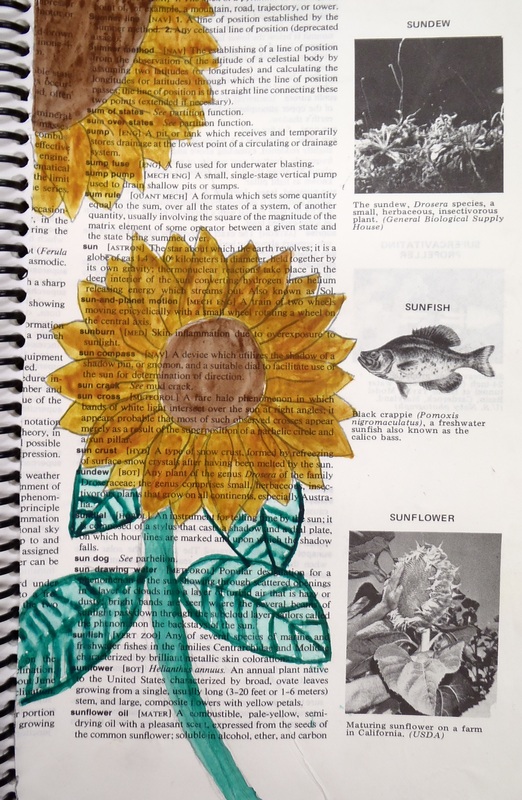
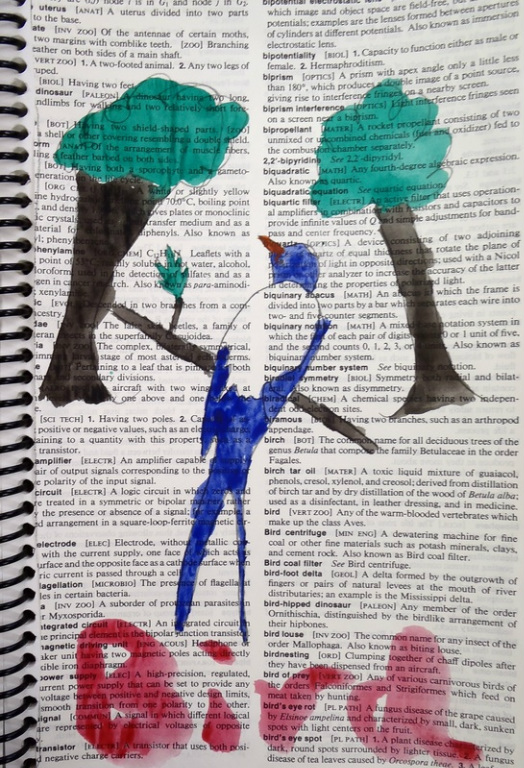
Art 1 students at Old Orchard Beach High School are given a weekly sketchbook assignment that they are required to complete as homework, or in class if they are caught up with the current project. I have taken over the role of giving the sketchbook assignment each week during my placement. Its been fun experimenting with small drawing, painting, and design projects. I alternate between relaxed experimental lessons and more traditional drawing assignments. Here are some examples from my two Art 1 classes: Scientific illustration was the first sketchbook assignment I gave. Students were required to draw at least three natural specimens from life, and label their sketches. 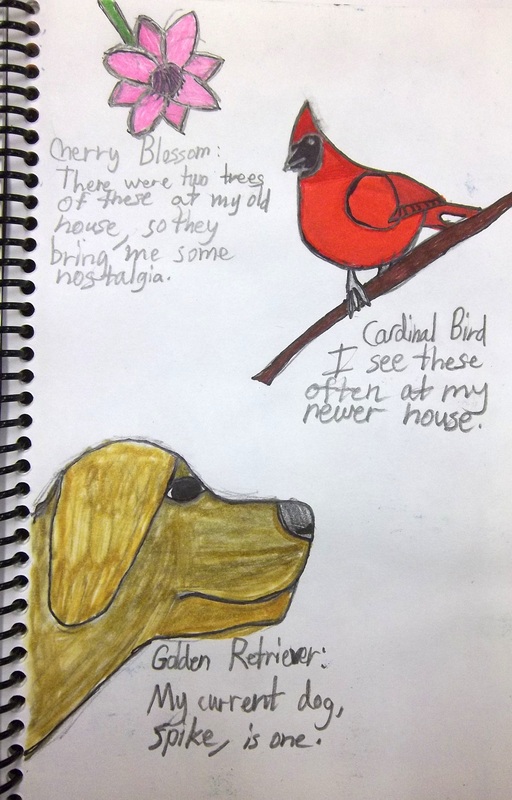 I like how this student wrote about the significance of his subjects. 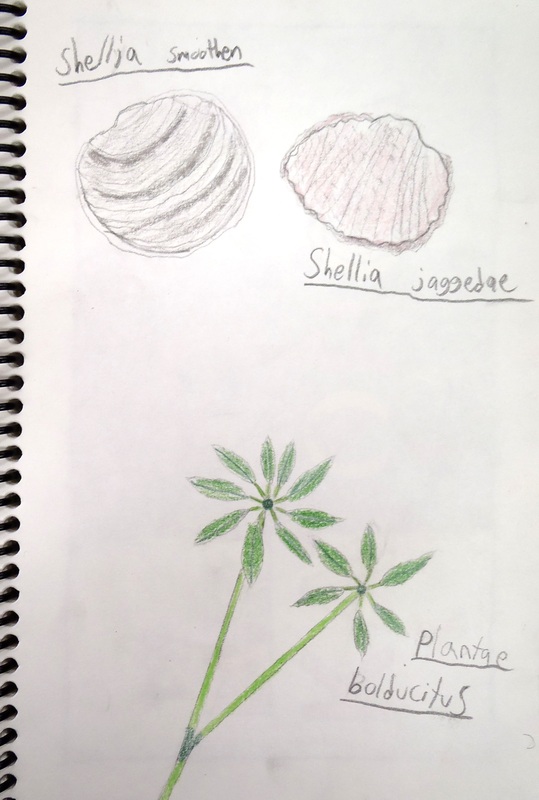 This student invented his own latin names for his specimens- notice the bolducitus plant which is one of Mrs. Bolduc's classroom plants. I was inspired by Amy Cousins in the creation of my Donald Evans themed postage stamp sketchbook assignment. Students were required to invent a country and design a stamp for it. The name of the country, the price of the stamp, and a perforated border were to be included in the designs. 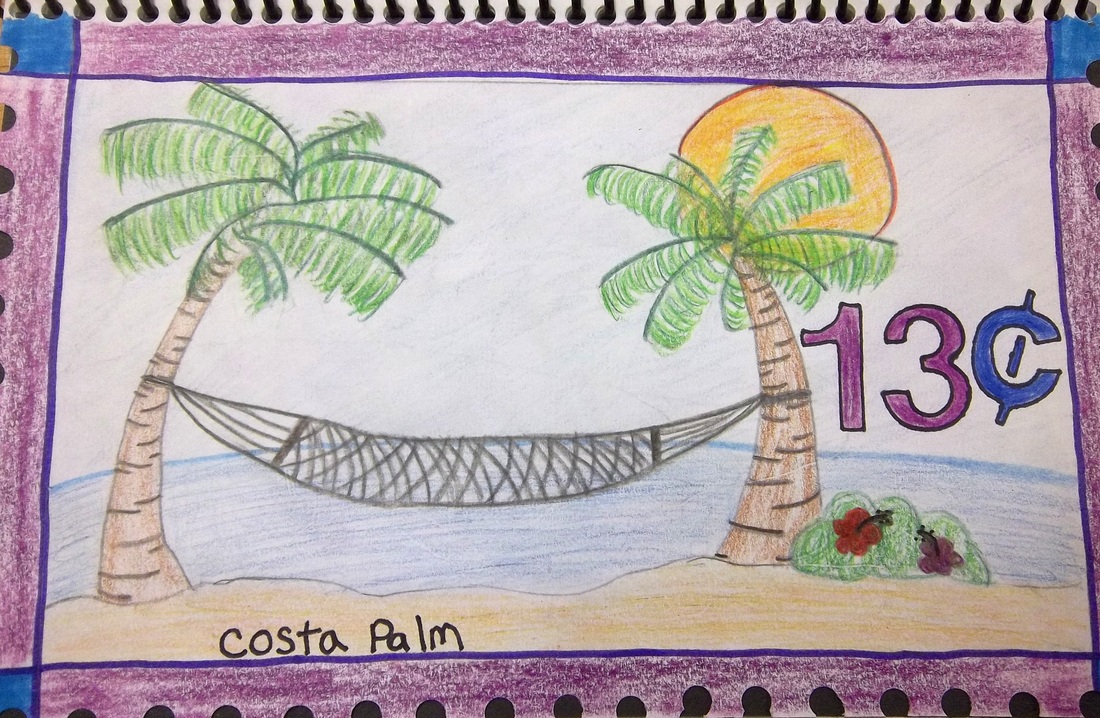 This student was inspired by her upcoming trip to Costa Rica. Two weeks ago, I gave an assignment entitled Painting on Pages; students were required to choose a page from an old encyclopedia that contained a word they would like to illustrate. Students then had to tear the page out, glue it into their sketchbook, and complete a watercolor painting of their chosen word on top of the page. I am really impressed with the results of the assignment. 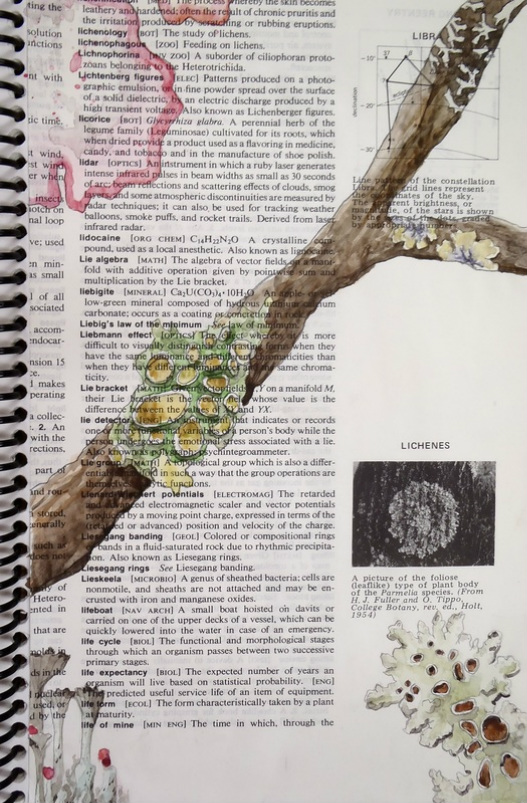 This was my example. I had a lot of fun with this assignment. Currently students are working on an observational drawing assignment in their sketchbooks. I am excited to see how they do. I can't believe it is my last week here. I don't want to leave!
Art 1 students at Old Orchard Beach High School are working on a literacy themed printmaking project! Last week I gave a slide show and lecture on the history of printmaking and then introduced the criteria for the assignment:
1. Choose a school-appropriate quote from a book that means something to you.
2. Choose at least one word from your quote to incorporate into your relief or monotype.
3. Design and carve a relief block that reflects the ideas, themes, or imagery present in your quote.
4. Design and create a gelatin monoprint that reflects your chosen quote and incorporates your relief print. 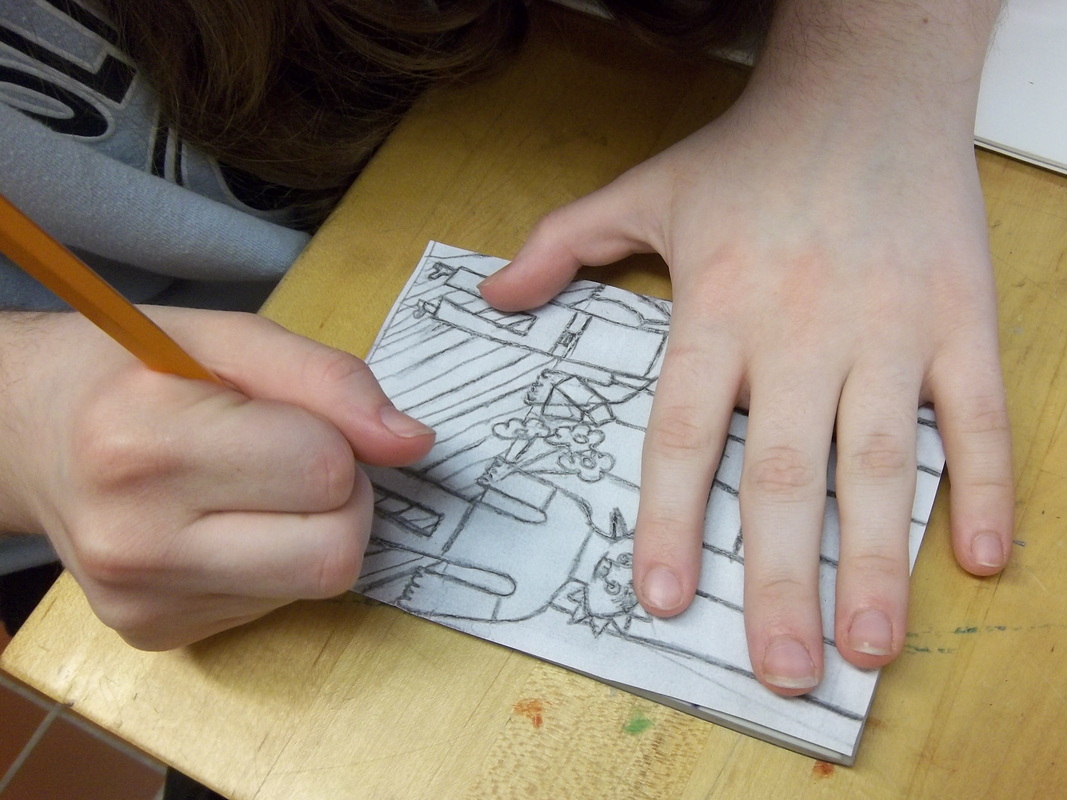 After students finished sketches inspired by their chosen quotes they transferred them onto the Easy Cut blocks. 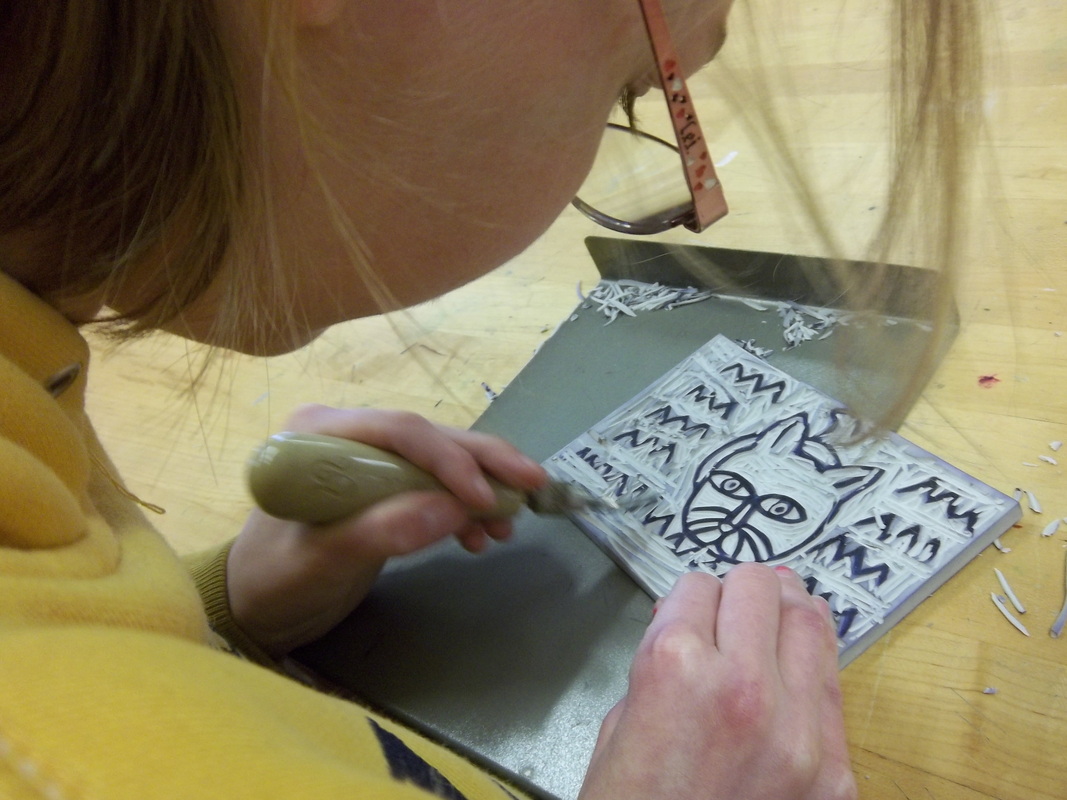 Once the image was transferred, students began using gouges to carve their relief blocks. 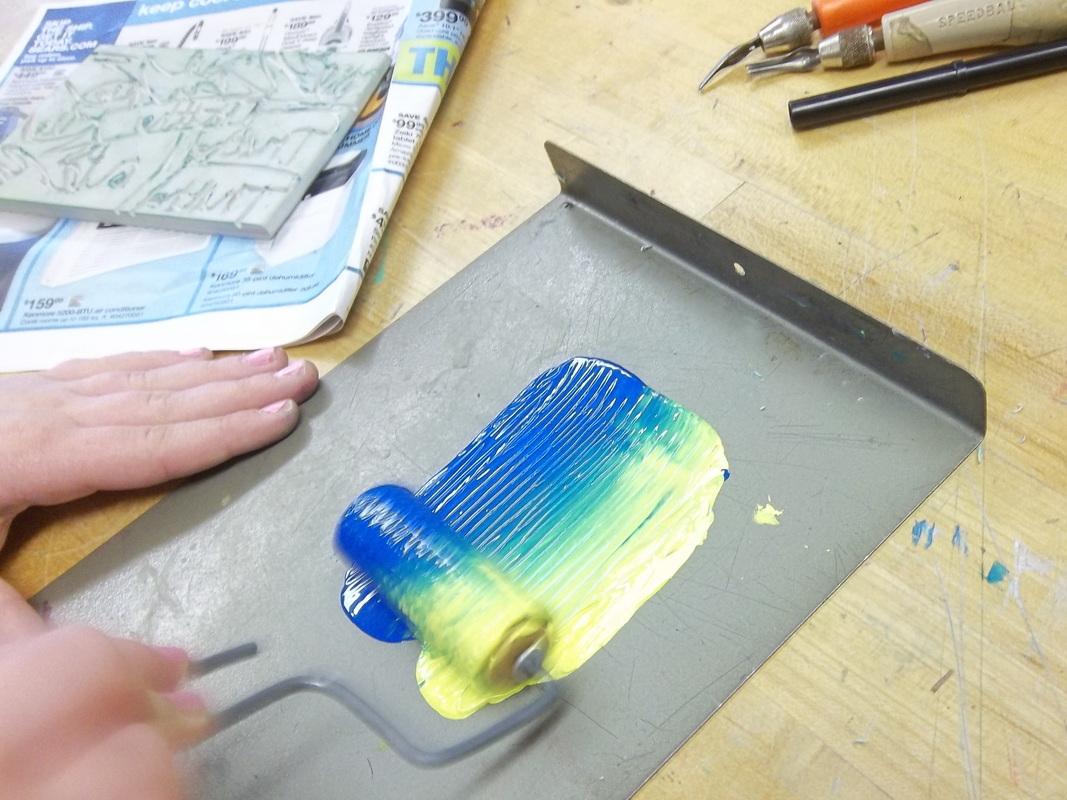 After students finished carving their relief blocks they prepared brayers and water soluble block printing ink.  They then added the prepared ink to their blocks. 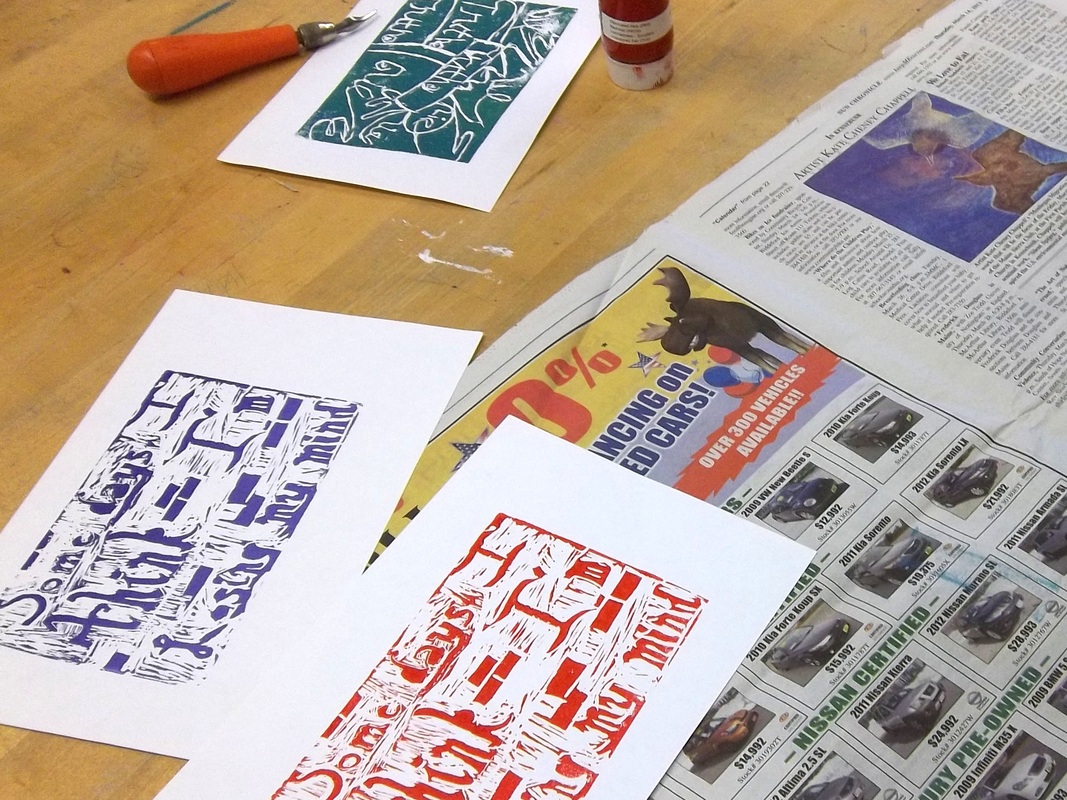 And they made beautiful prints!  Here is my example. It was a lot of fun! I hadn't carved with Easy Cut since I was in middle school.
I started to teach some of my own lessons this week at Old Orchard Beach High School. I gave my first sketchbook assignment for the Art 1 classes, and introduced a Calder style mobile lesson with my sculpture students. 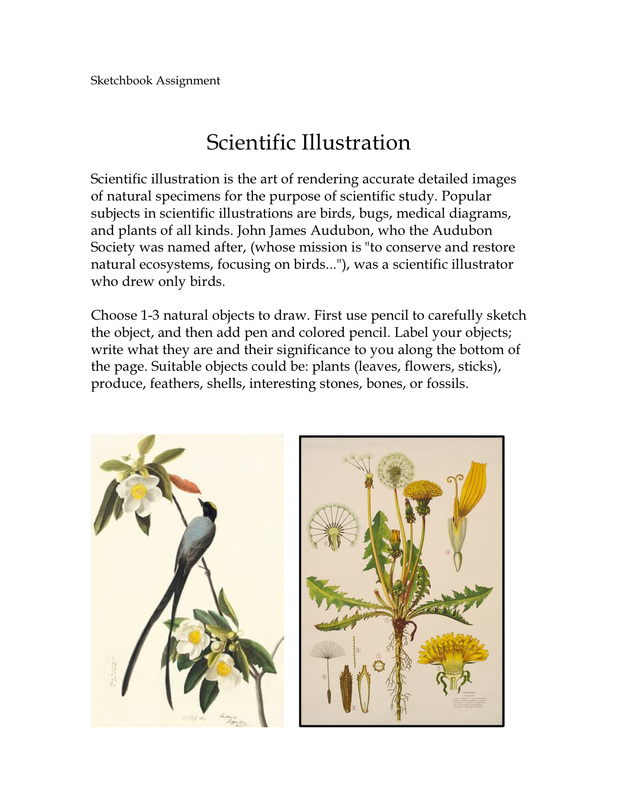 Scientific Illustration was the first weekly sketchbook assignment I gave at OOB. I can't wait to see what they choose to draw. On Tuesday I gave a lecture and slide show to my sculpture students about Calder and his mobiles.
I then outlined the criteria for the mobile assignment:
1. Construct an original Calder inspired mobile with at least 9 colored shape elements.
2. Use balance, spacing, size, color, and shape to create a dynamic moving composition.
3.Demonstrate craftsmanship:
No unwanted kinks in the wire
Paper is well attached, not falling off, and no unwanted holes.
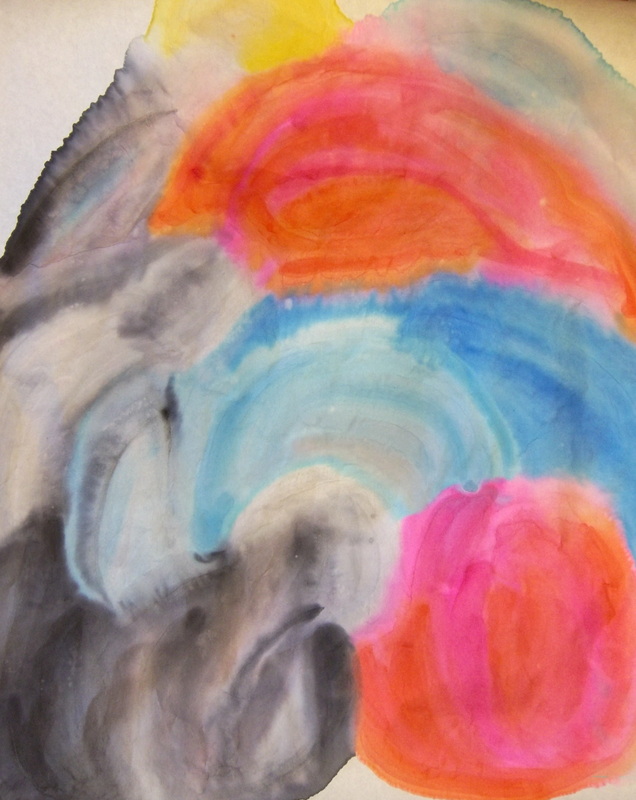 Students painted sumi paper with watercolors to use for the colored shape elements. 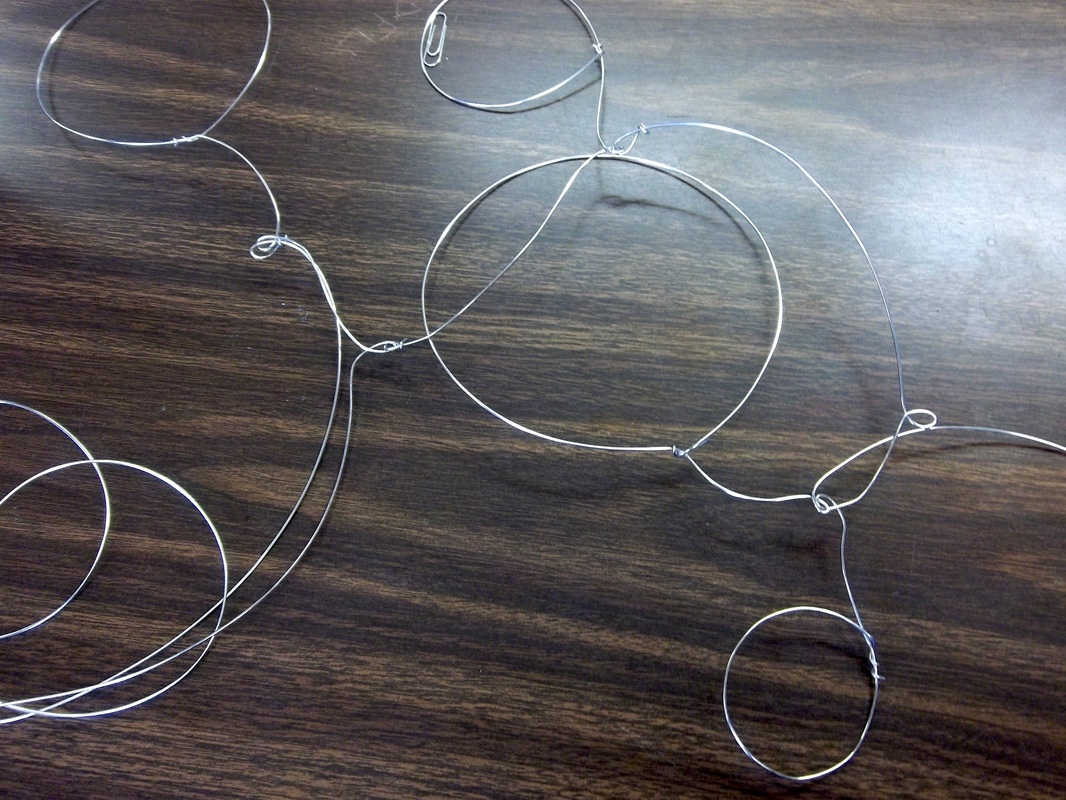 Students started bending wire to create their balanced mobiles. 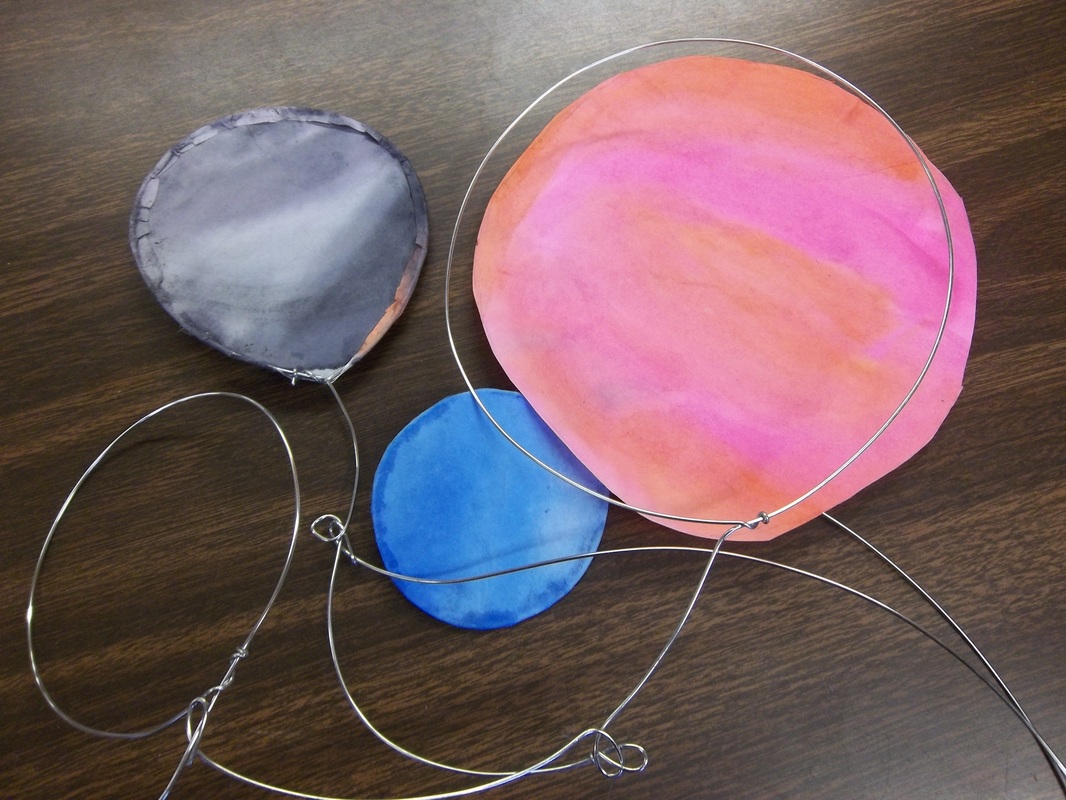 Next week students will start to add their sumi paper! 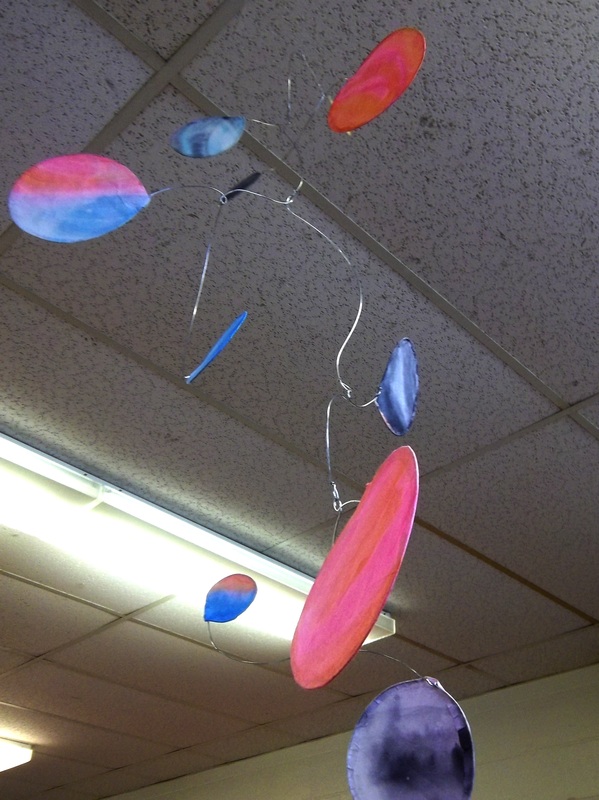 Here is one of the two sample mobiles I created for the project. Stay tuned for more mobiles from the sculpture students!!
Click on the button below to download my Calder Style Mobile lesson:
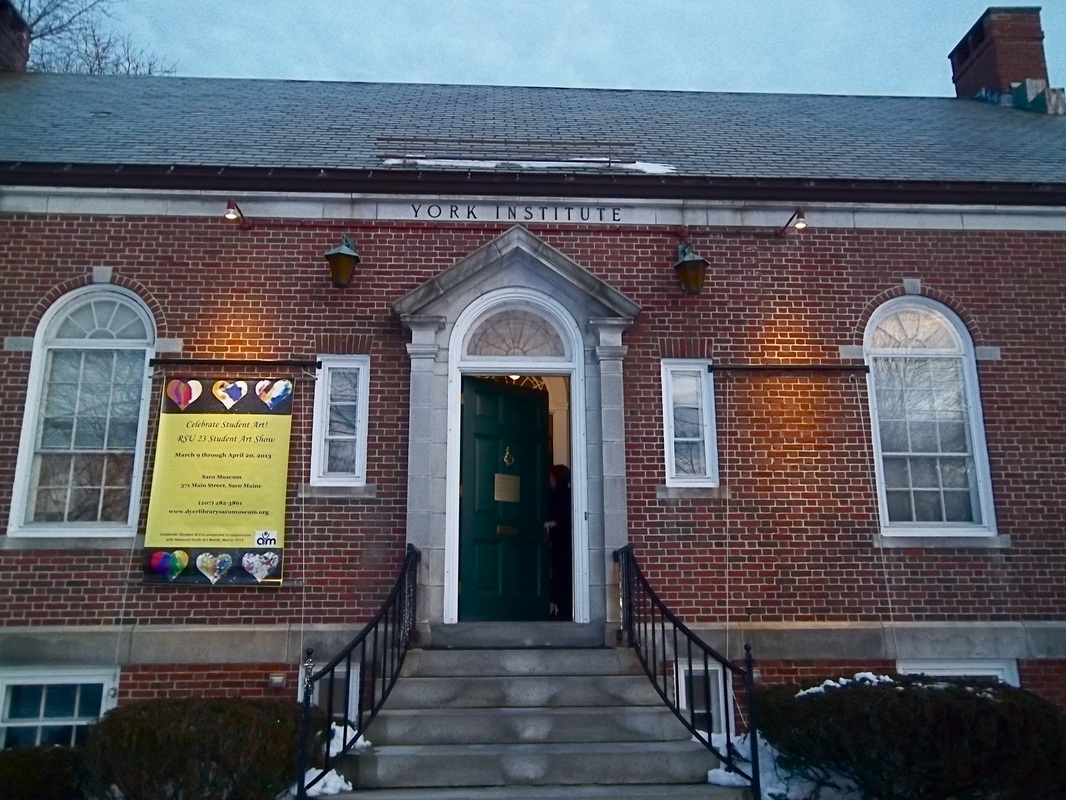
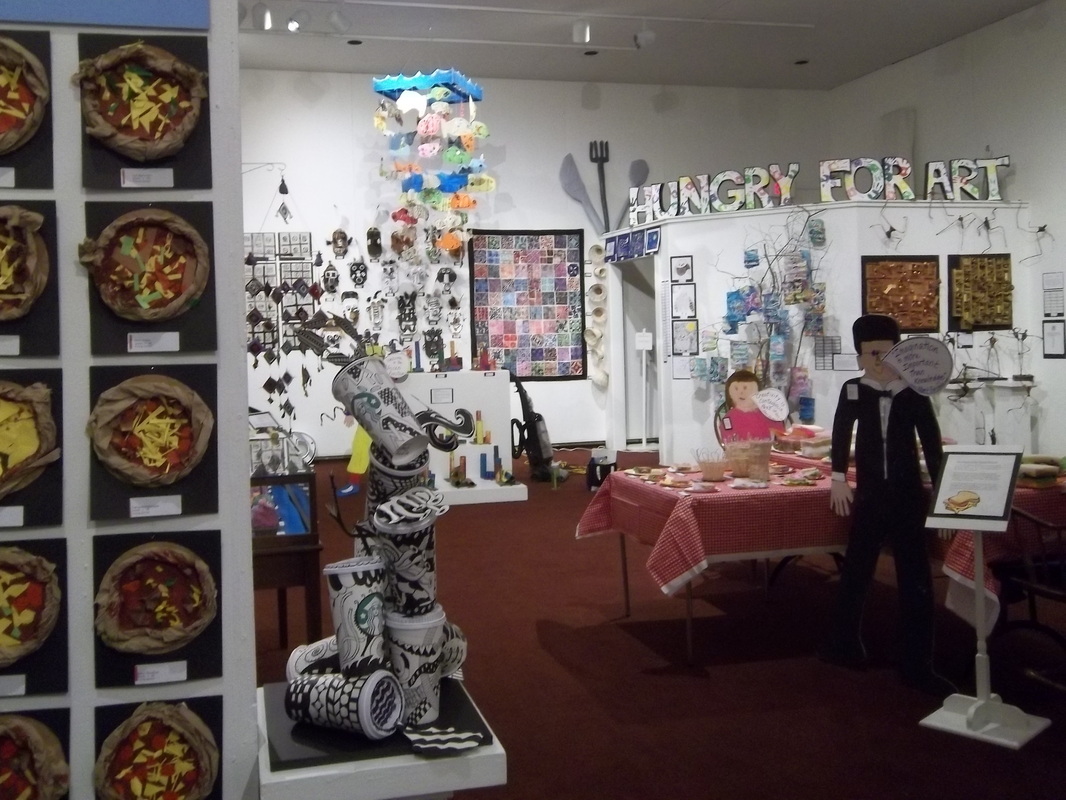
This week my High School mentor Piper Bolduc and I were busy setting up the district K-12 art show at the Saco Museum. This year the title is "Hungry for Art", and much of the work in the show reflected upon that theme. It was a wonderful to get to experience setting up a district art show, to meet many other art educators, and to see countless examples of amazing lessons I could potentially teach in the future. 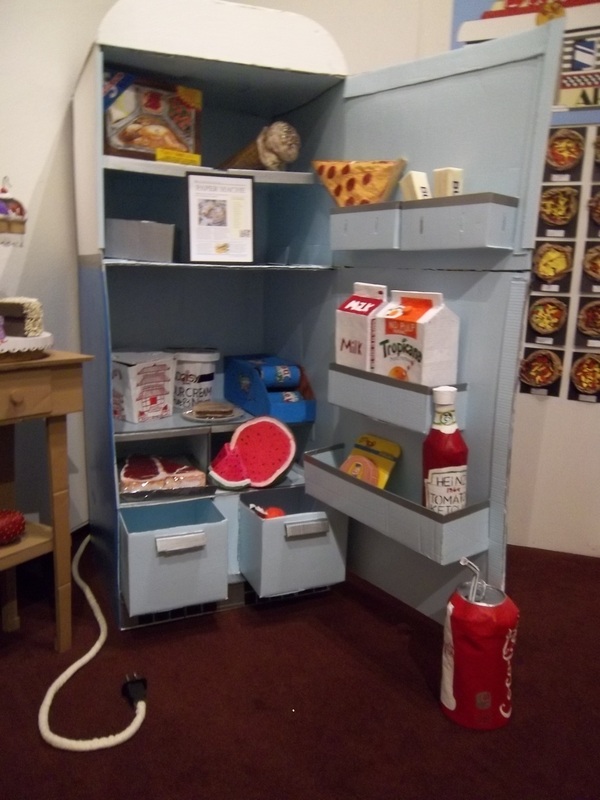 "The Big Chill" was the pride and joy of the advanced art students from Old Orchard Beach High School. 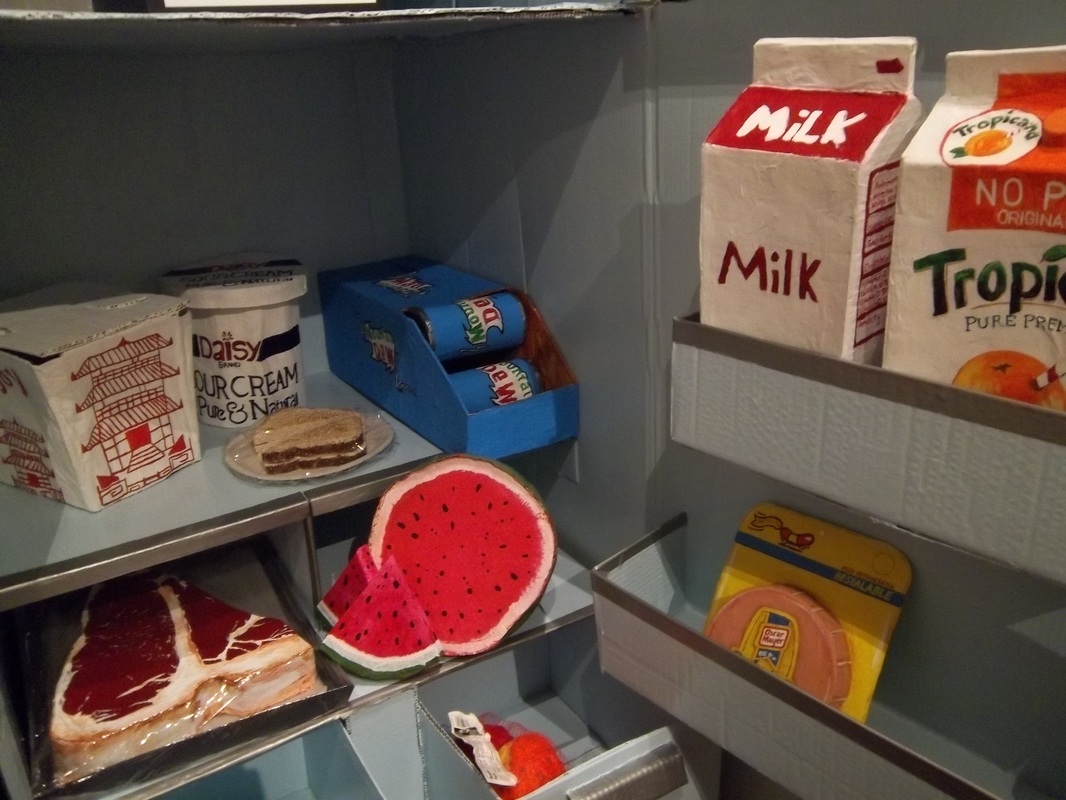 Inside of "The Big Chill", all of the food was made larger than life out of paper mache 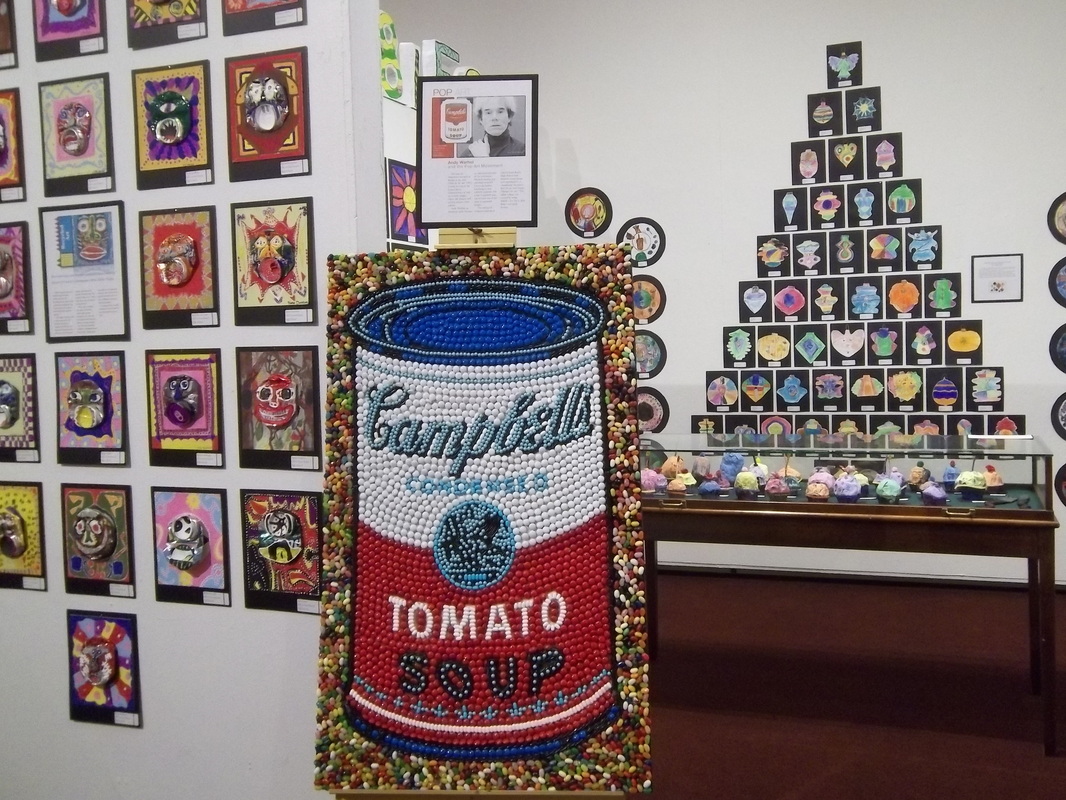 Inspired by Andy Warhol's Pop Art prints, this Campbell's soup can was made entirely out of candy by Old Orchard Beach High School students. 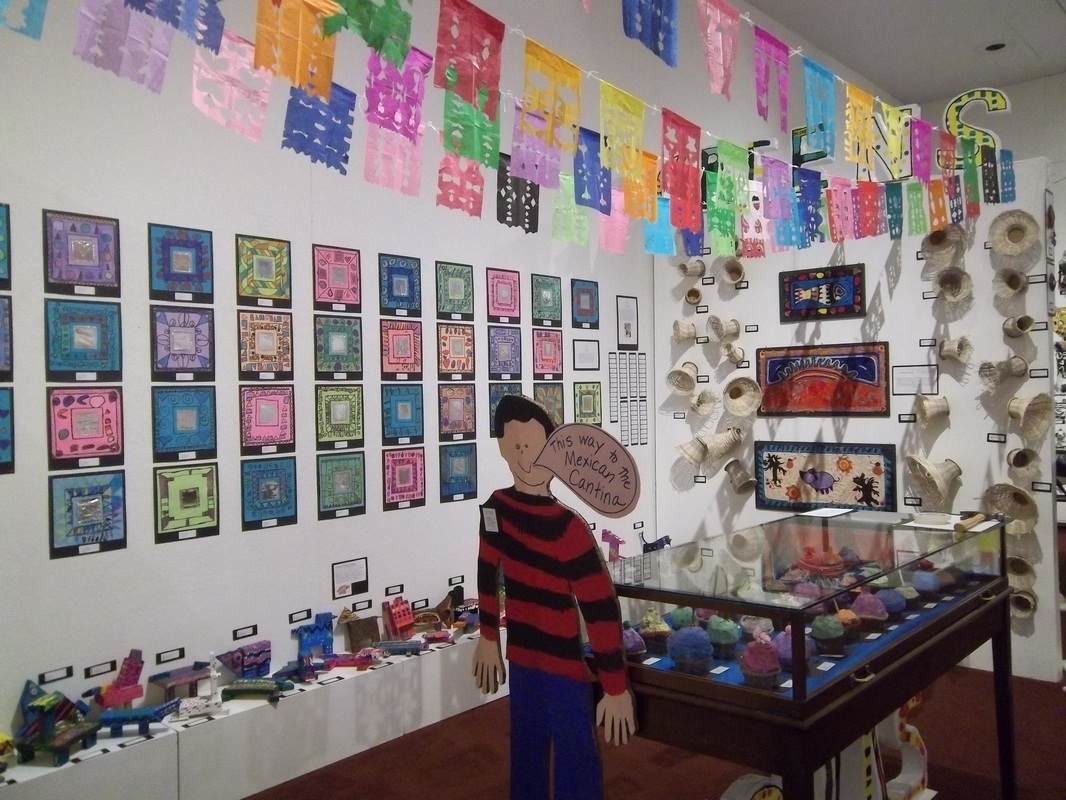 Sections were divided by theme, this is the Mexican Cantina. The museum is filled with SO much art! Here are some of the projects that I really enjoyed: 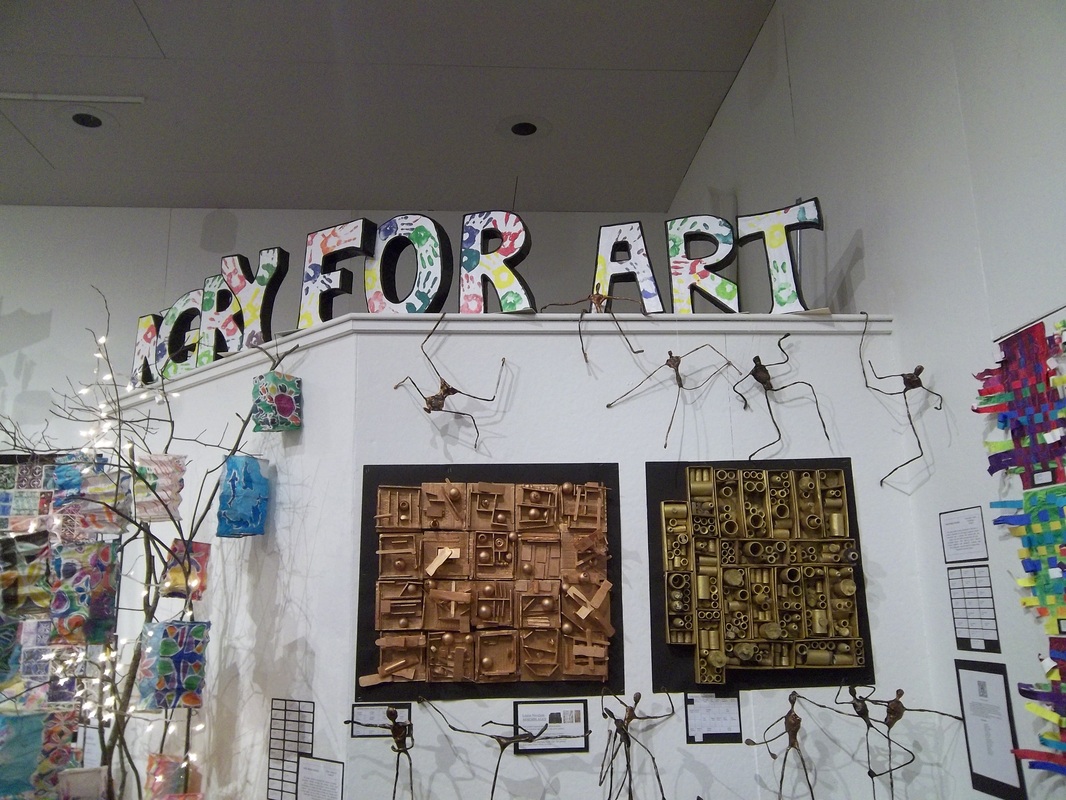 Paper mache letters by Loranger Middle School 7th grade students, Giacometti figures by 8th grade Saco Middle School students, and Nevelson studies by 1st grade Young Elementary School students. 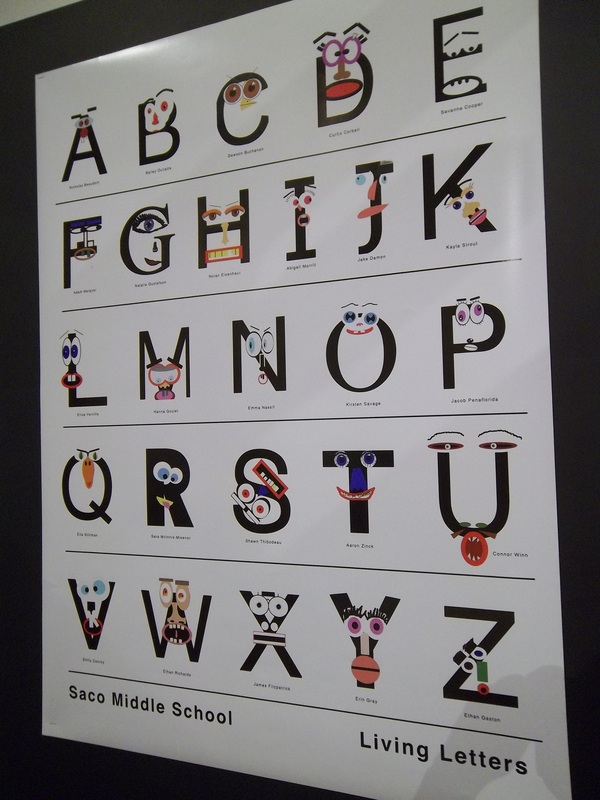 "Living Letters", a digital design project by Saco Middle School 7th grade students.  Collapsable paper lanterns by Saco Middle School 8th grade students. 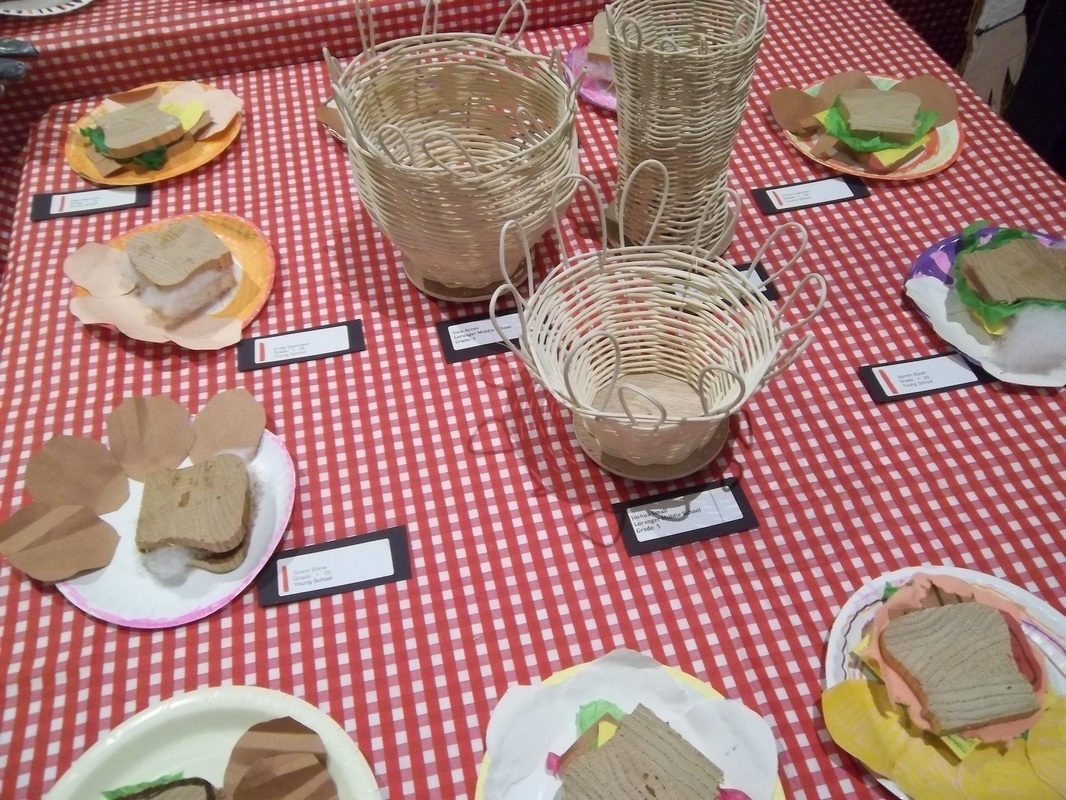 Baskets by 5th grade Loranger Middle School students and sandwiches by 1st grade students at Young Elementary School. 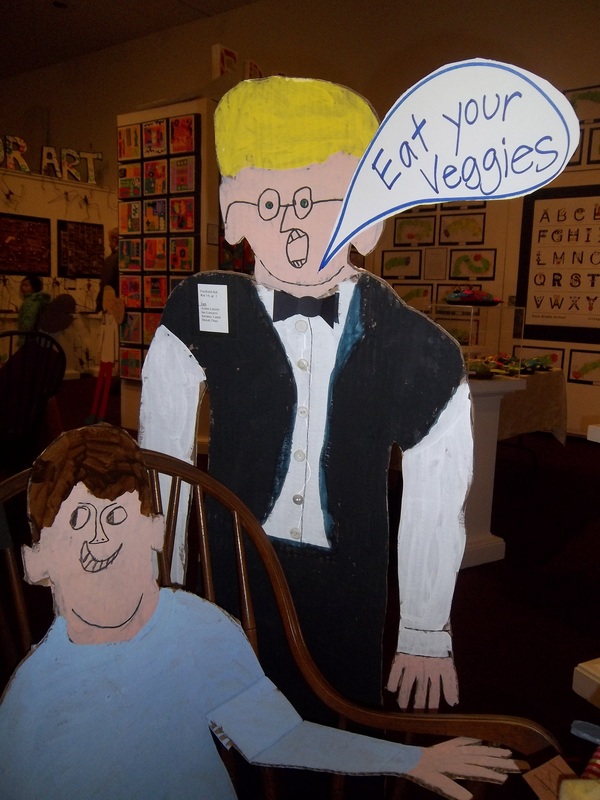 We brought some humor to the show by giving captions to the cardboard portraits by 1st grade students at Fairfield Elementary School.
The show is up until April 20th at the Saco Museum located at 371 Main St. Route 1, Saco, ME.
Hours at the museum are:
Tuesday-Thursday- 12:00-4:00PM
Friday- 12:00-8:00PM
Saturday- 10:00AM-4:00PM
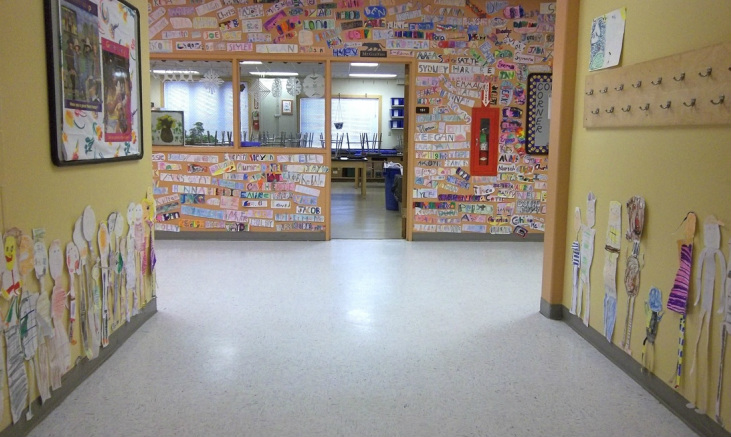 The view of the art room featuring illustrated names by all students and patterned portraits by 1st and 2nd grade students. I had a busy last week at Poland Community School! First and second grade students made large patterned shelf-portraits and contemporary paper mosaics were made by 3rd grade students. Students in grades 4 and 5 finished up their observational drawings and self-assessments, and the 6th graders finished up tessellations. 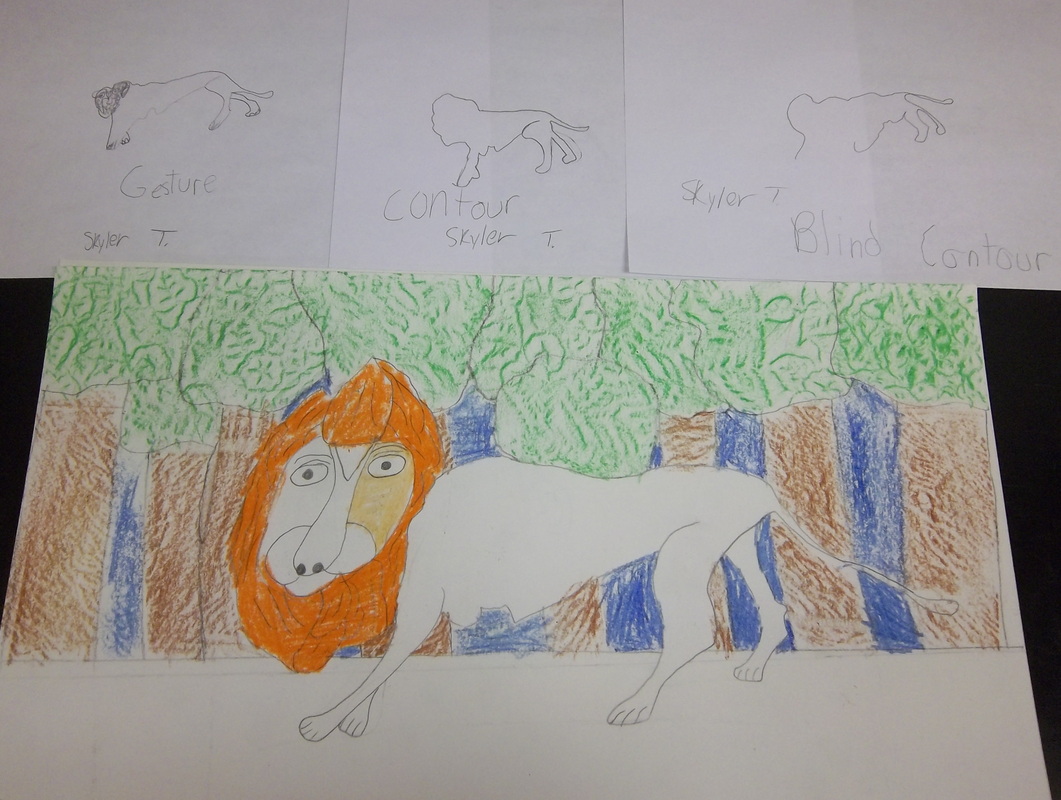 Fourth and fifth grade students practiced gesture, contour, and blind-contour drawings before beginning their final copy.  Drawings improved with each attempt! 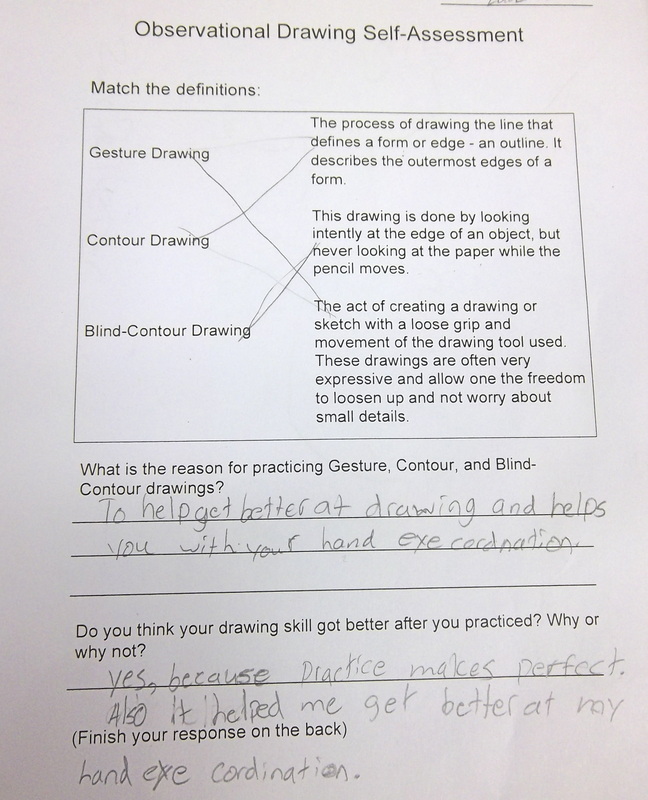 Self-assessments gauged understanding of the vocabulary and the objective of the lesson. I had so much fun with the patterned portraits done by the 1st and 2nd graders! Each student had to create a self portrait on three pieces of paper featuring three different patterns. Once students were finished they hung their portraits in the hallway grouped by class. The self-portraits were a colorful and welcome addition to the hallway leading to the art room. 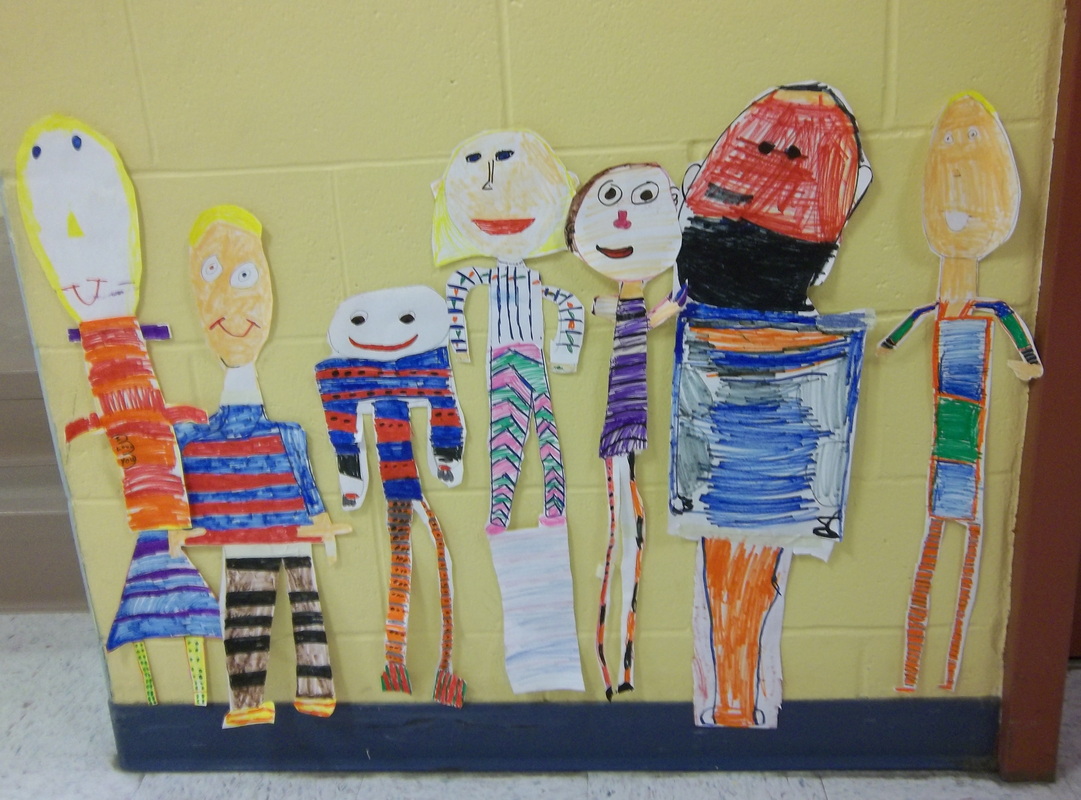 First grade patterned self portraits 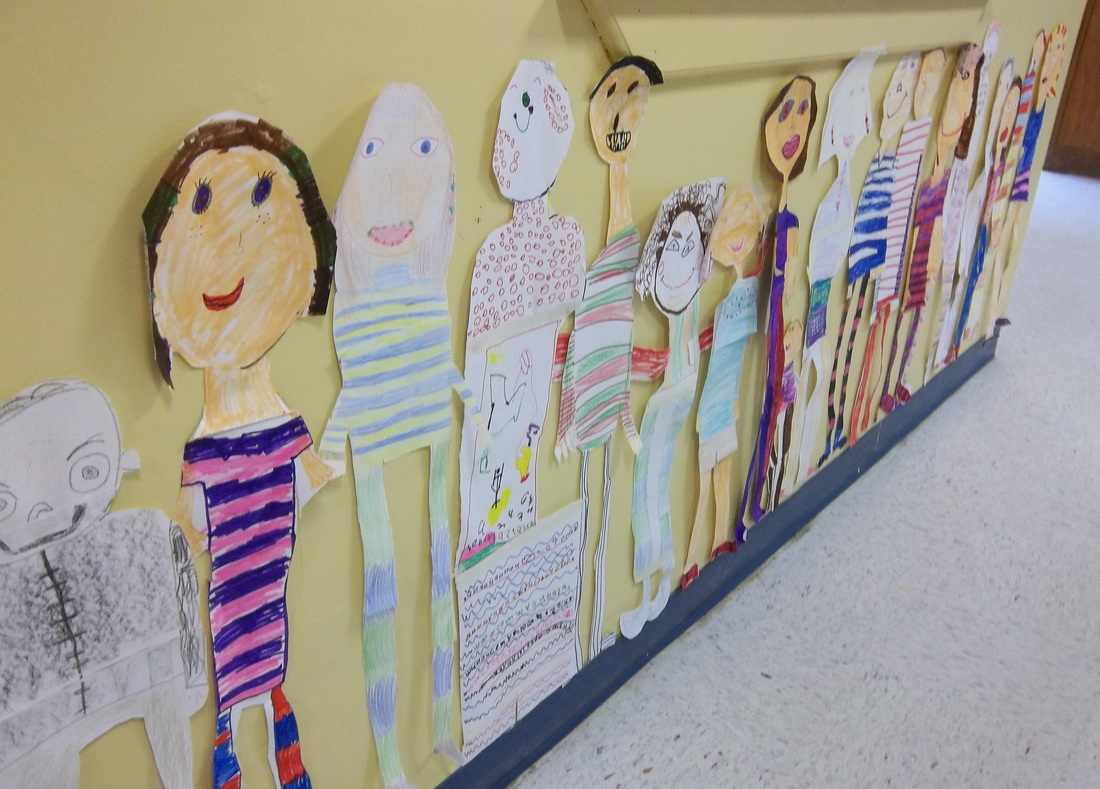 Second grade patterned self-portraits 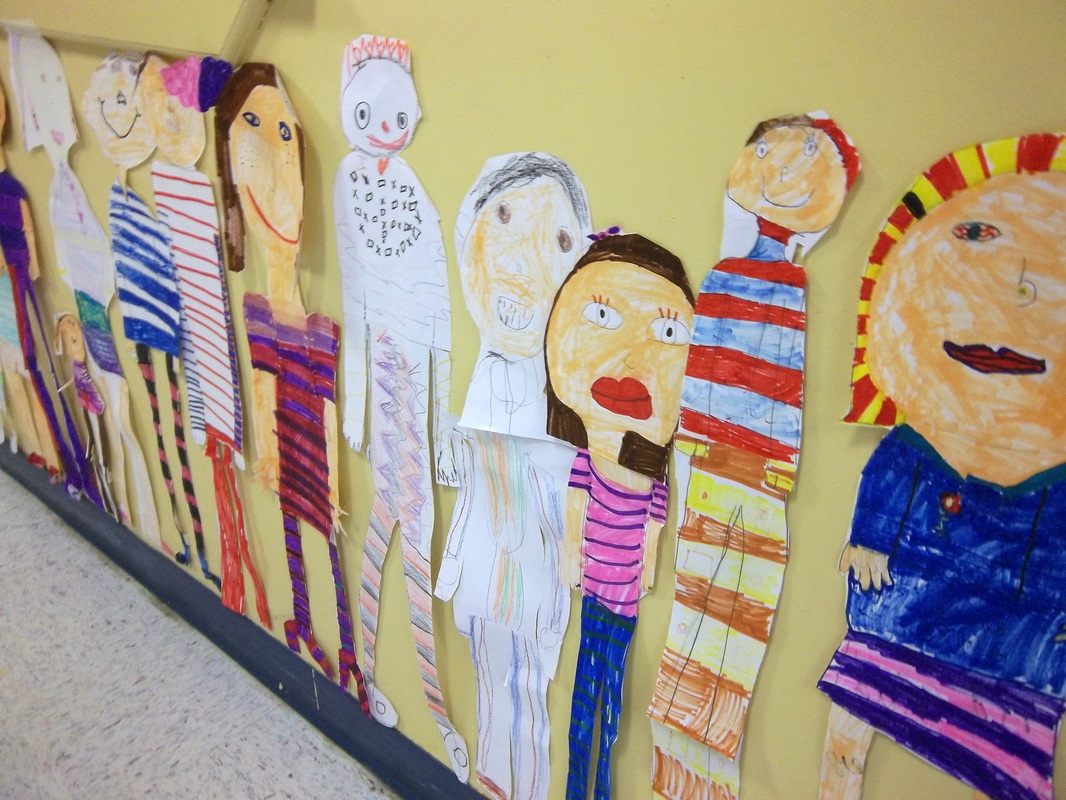 More second grade patterned portraits The kindergarten students needed a one class project, so I decided to have them draw simple patterned birds. First we talked about different qualities of birds: beaks, feathers, talons, and webbed feet. Then I showed students how to make a simple bird from a half circle for the body, a circle for the head, and a triangle for the beak. Students were then asked to decorate their birds with a pattern. I was so impressed with these adorable birds from such a short and simple lesson, I would love to have more time for a project like this with the younger age group. Because we had a little extra time in one of the classes I had students come up with a story to share about their bird(s). Hearing their stories was so inspirational- I would love to teach more literacy themed projects. 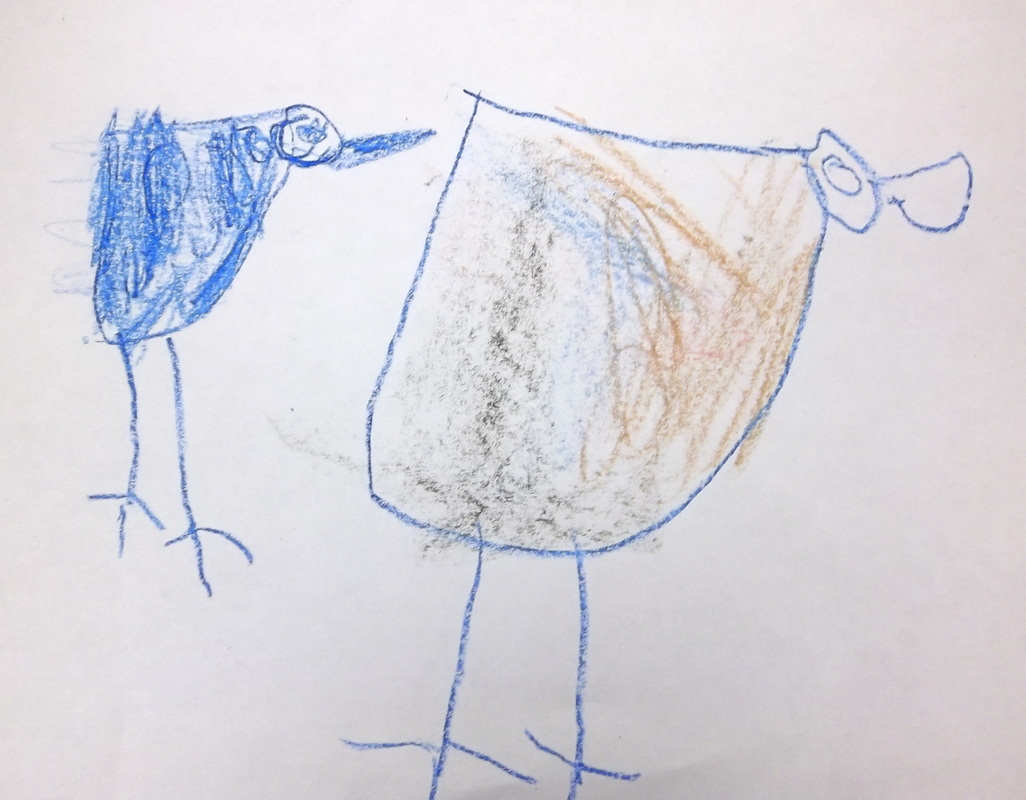 Some students decided to draw multiple birds. 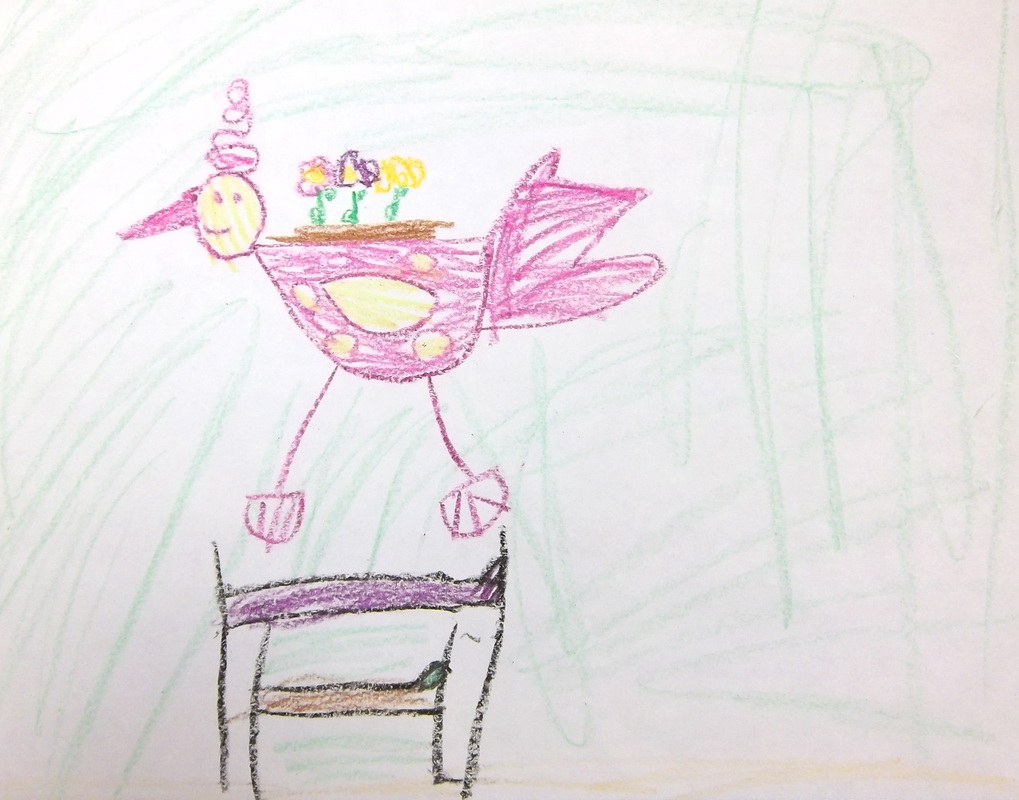 "This bird has a garden growing out of it." -Olivia 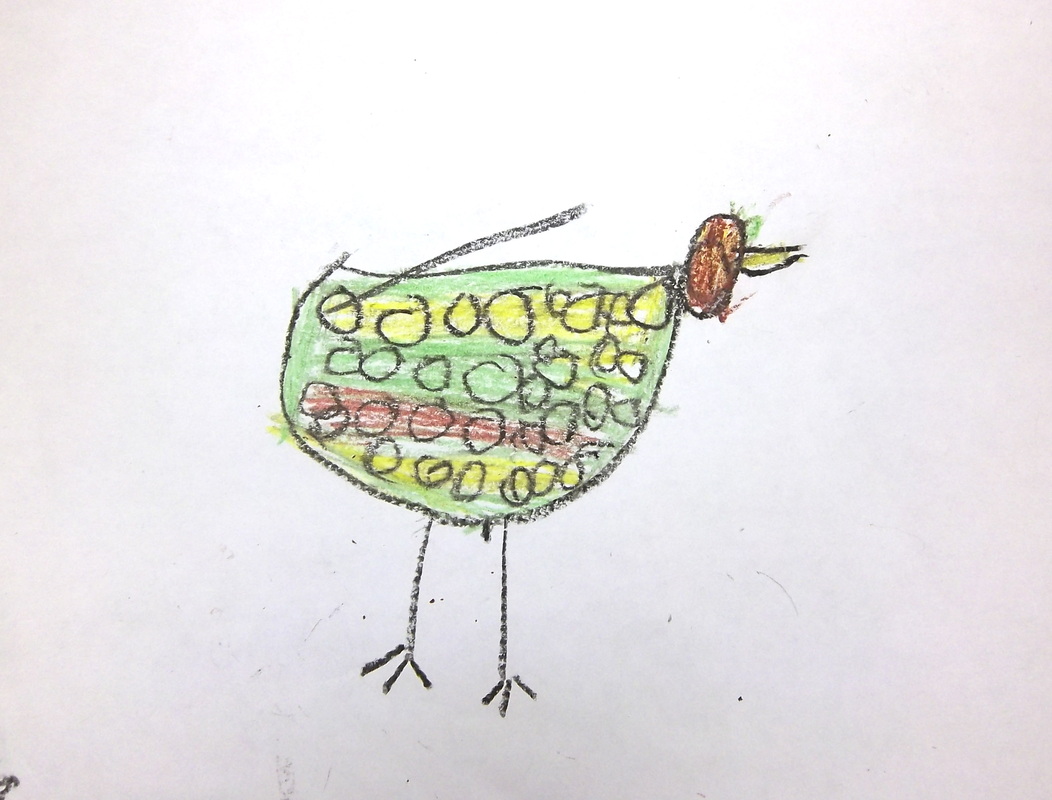 Some students were very focused on their patterns. 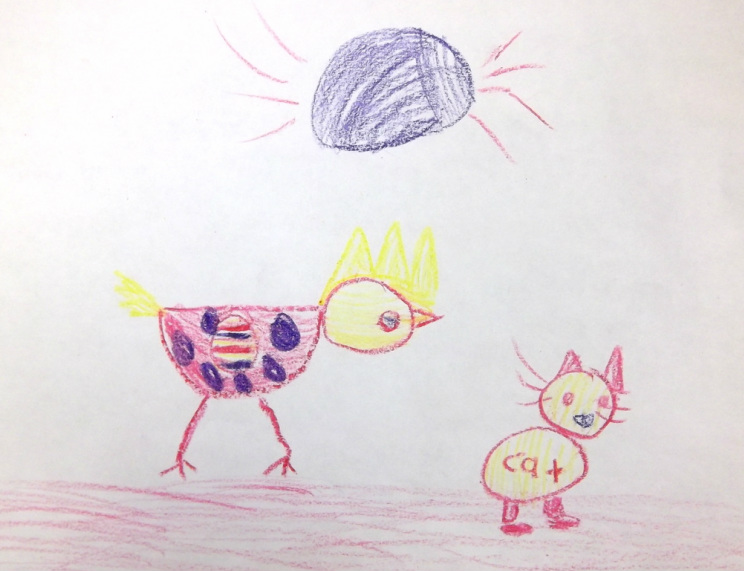 Some students added other elements to their compositions. I am going to miss everyone from Poland Community School. I have learned so much from my time here.
Next week I switch gears and start teaching at Old Orchard Beach High School!
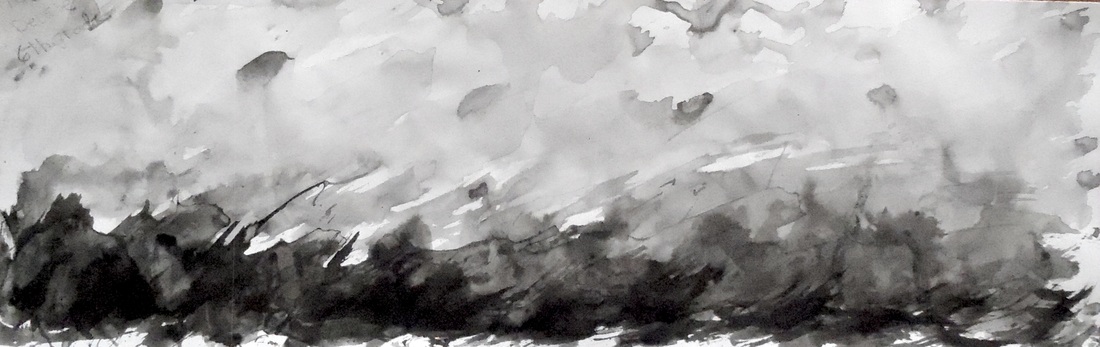
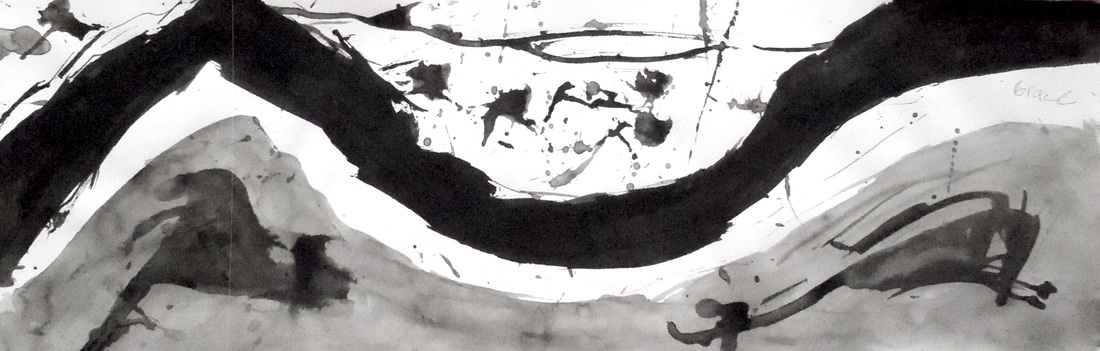
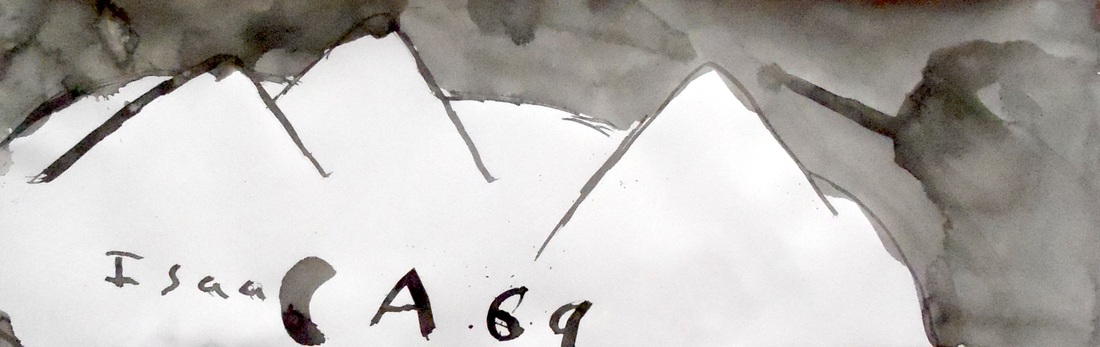
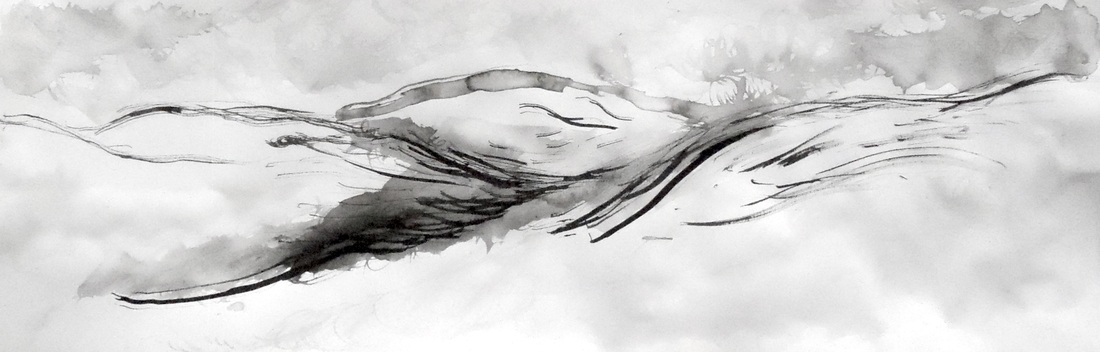
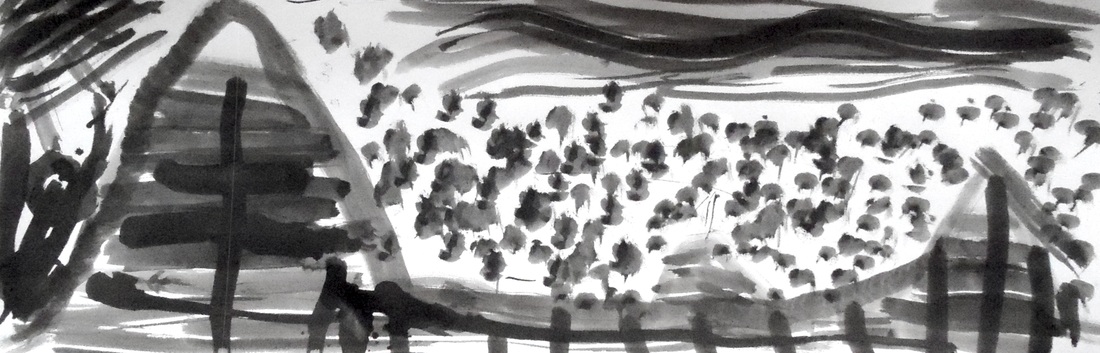
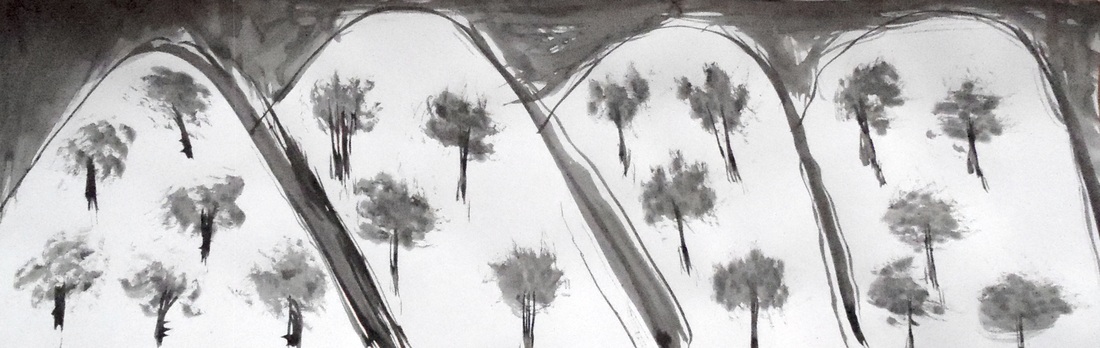
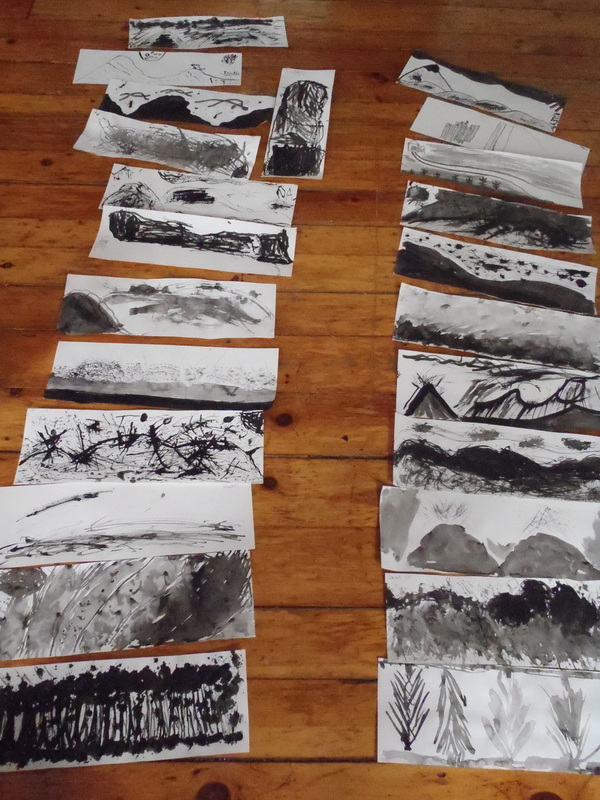
After the students in grades 3-6 at Poland Community School finished their handmade paintbrushes, they learned about Chinese Landscape Painting. Students discussed the particular qualities of Chinese ink paintings and identified their use of value, contrast, and texture. I explained how they could achieve value, contrast, and texture in their own ink paintings, and reinforced that they did not have to paint scenes that looked exactly like Chinese Landscapes, but that they could paint any kind of landscape in any way they desired. After careful collection of materials, students set to work creating some really amazing landscape paintings using paintbrushes they had constructed themselves. 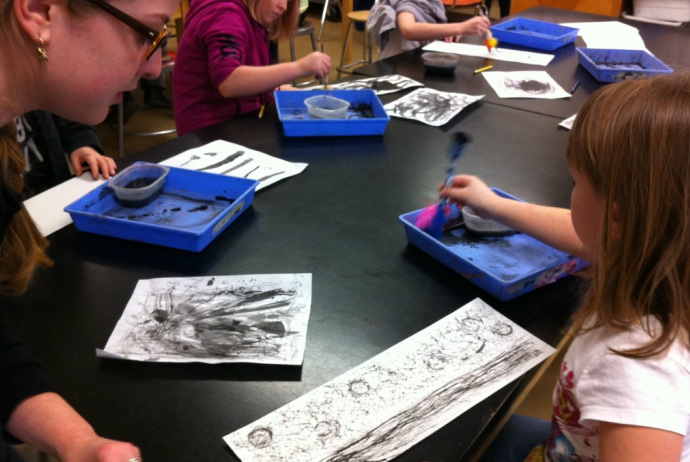 It was wonderful to see how each student discovered different ways to use their paintbrush. 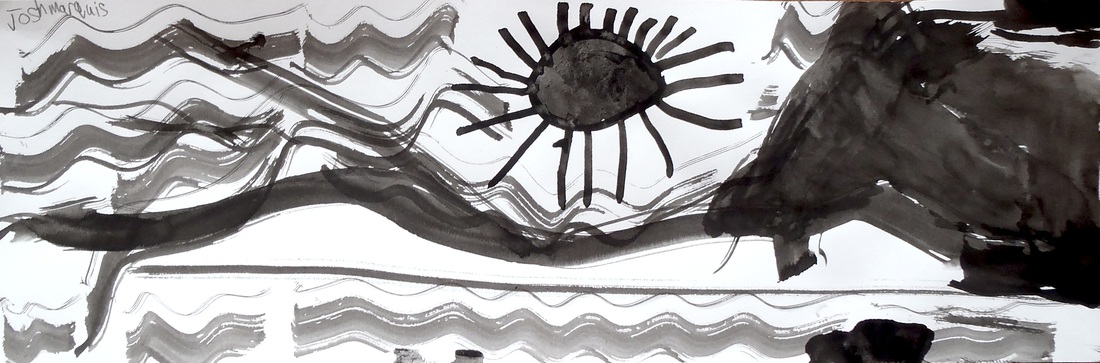 Students were required to demonstrate the use of contrast, texture, and three different values in their landscape paintings. 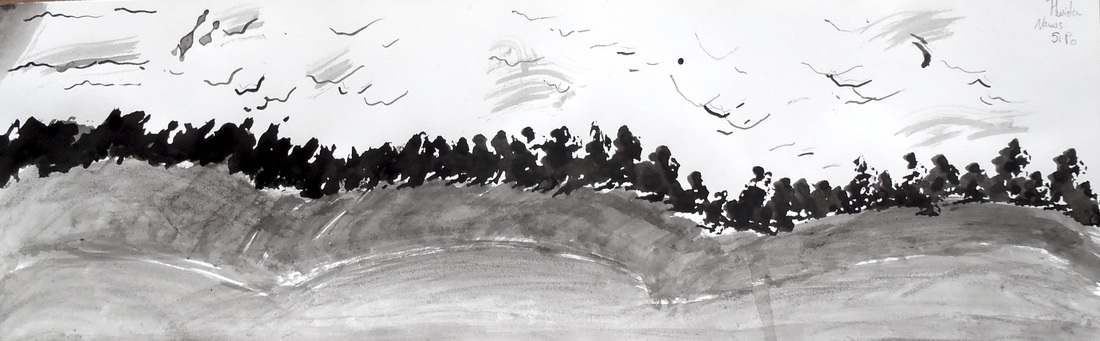 Some landscapes looked like they were inspired by the Poland area. 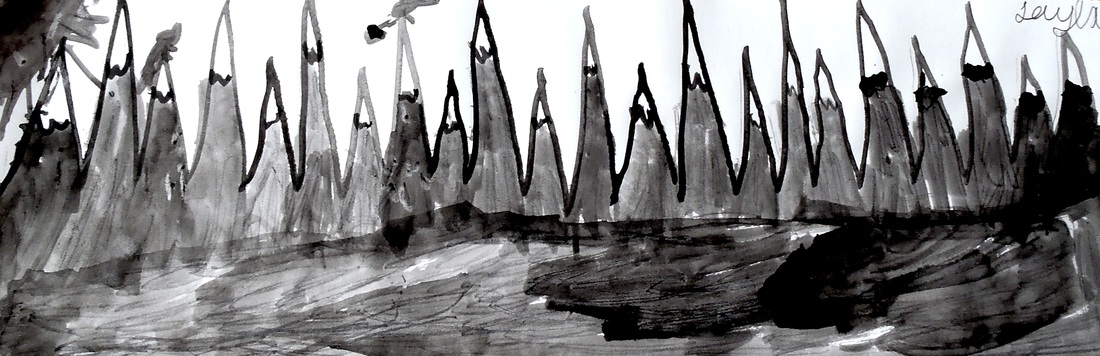 Some students took a bold graphic approach. 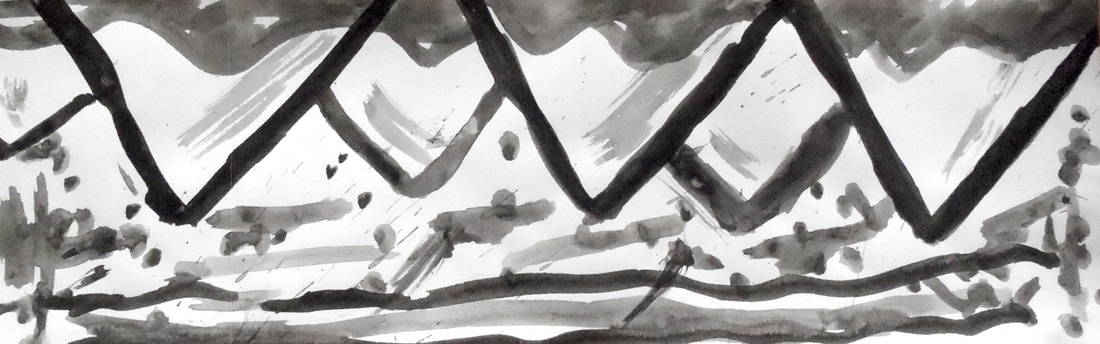 Some landscapes had beautiful pattern and rhythm. 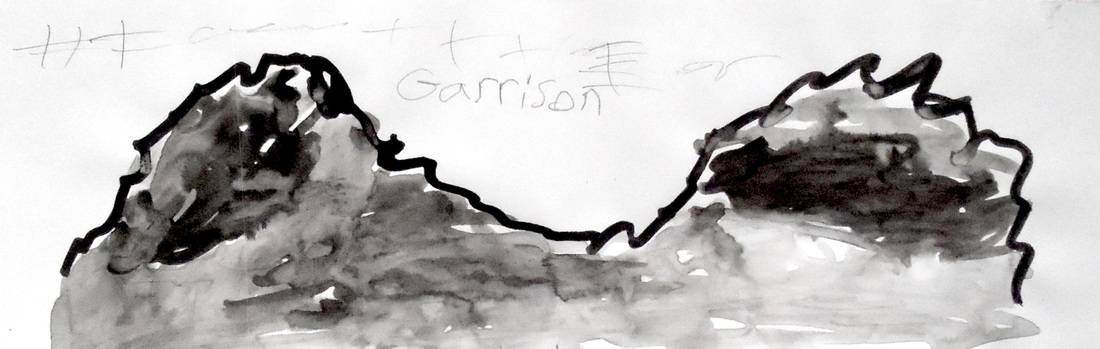 Some demonstrated incredible use of line. 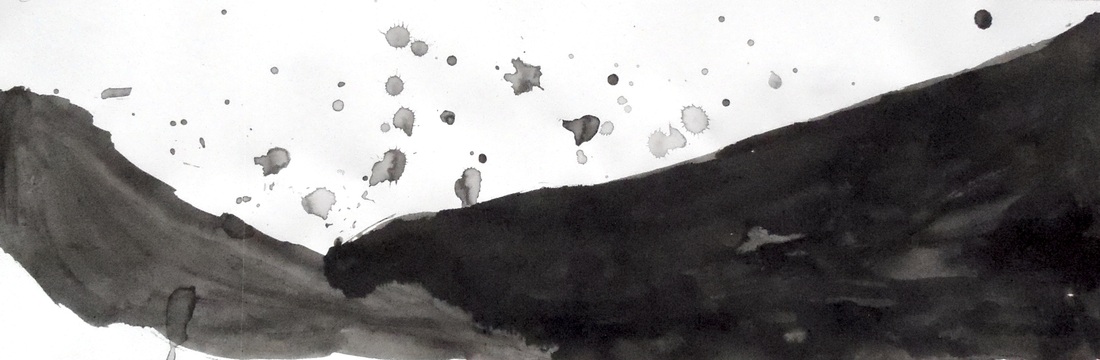 Many paintings looked as if they were inspired by the impending blizzard that canceled school on Friday. 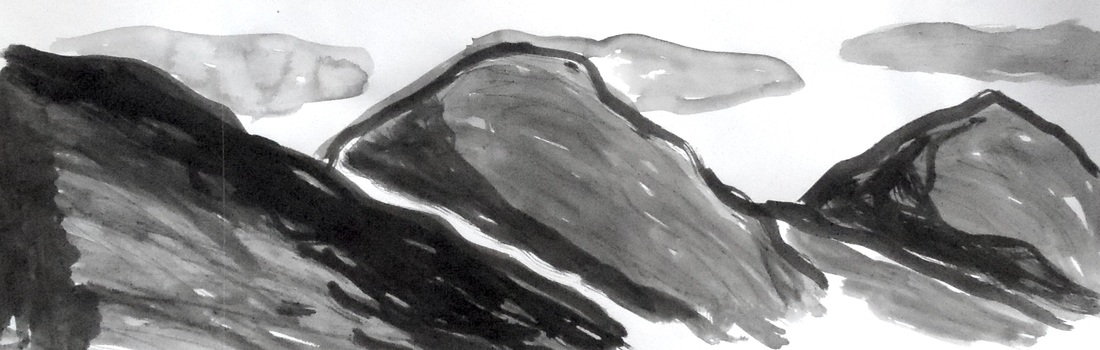 There were many beautiful renditions of mountains.  There were lovely studies of trees and orchards. It was so difficult to choose paintings to photograph because every student did an amazing job. All of the students pushed themselves beyond their comfort zone in the construction and use of their handmade paintbrush, and I am so incredibly proud of the artwork the students at Poland Community School are creating. Hopefully many of these ink paintings will make it into the district art show!
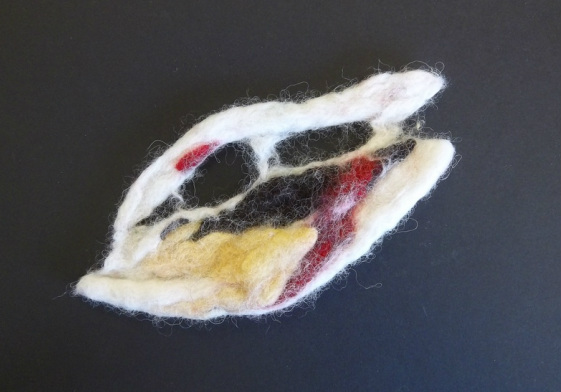
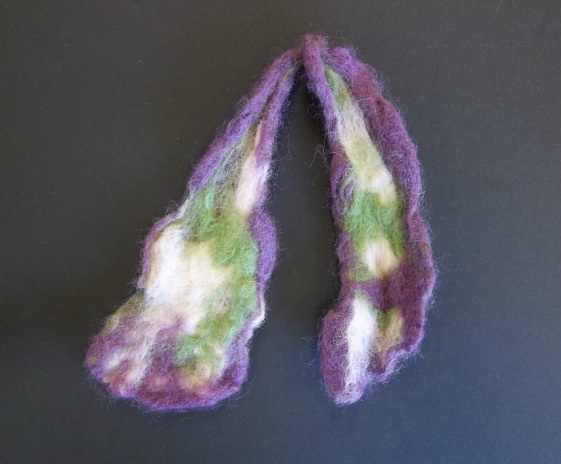
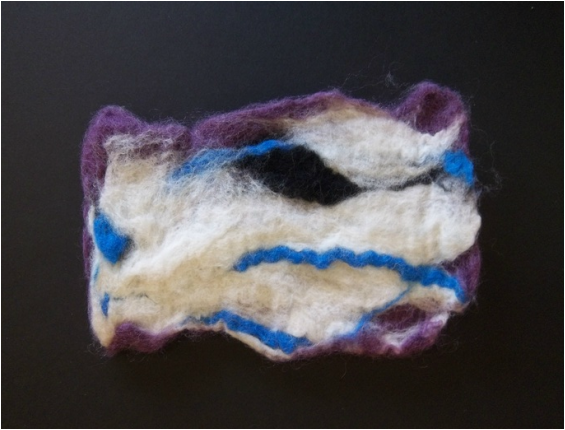
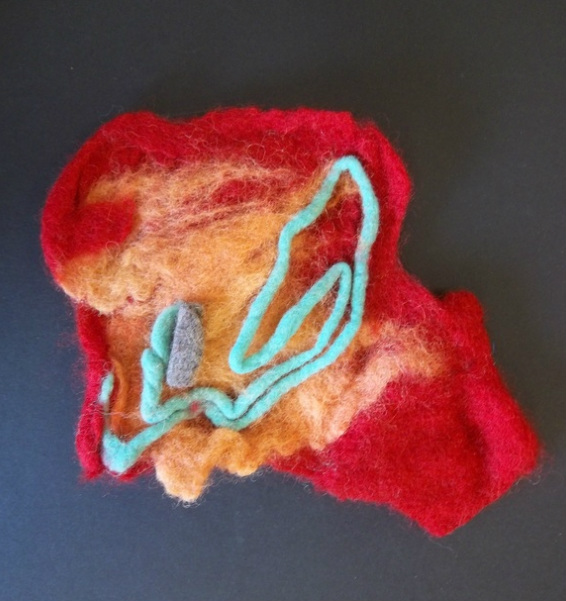
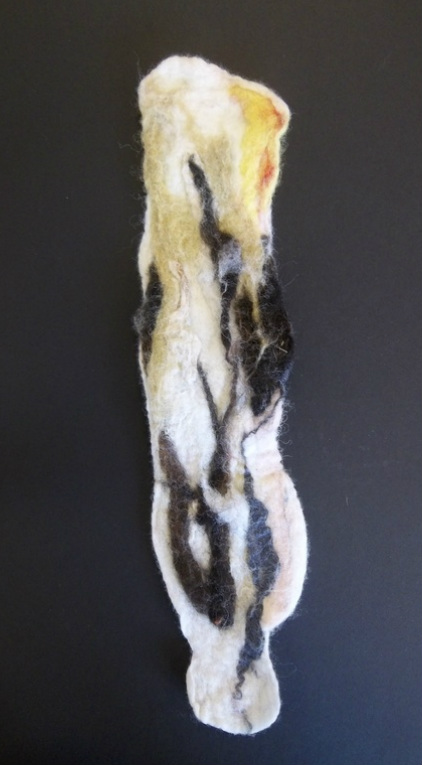
Wow, the felt that is being made at Poland Community School is beyond beautiful. I am so proud of my students.
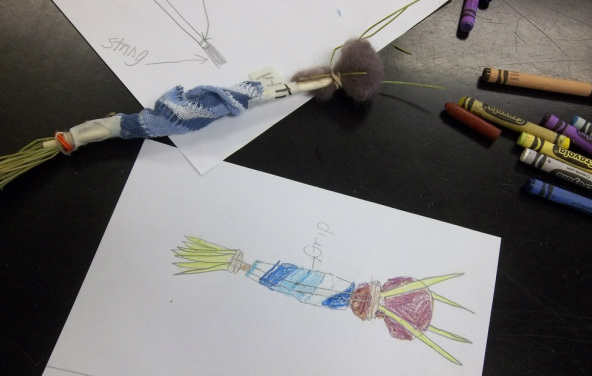
This week, Poland Community School students in grades 3-6 made amazing, handmade paintbrushes from found and recycled materials.
After an introduction to the traditional method of Pueblo yucca paintbrush construction, students were let loose to explore combining various materials in the construction of a personal paintbrush. 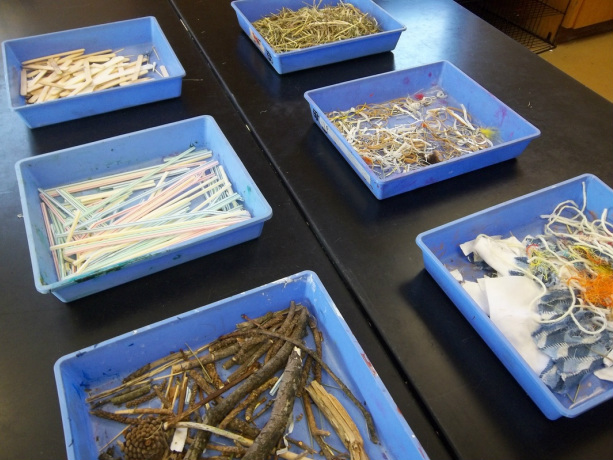 Materials available included chopsticks, popsicle sticks, straws, yarn, pine needles, hay, rubber bands, wire, and wool. After students completed their paintbrush, they created observational sketches labeling the materials used in the construction of their new tool: 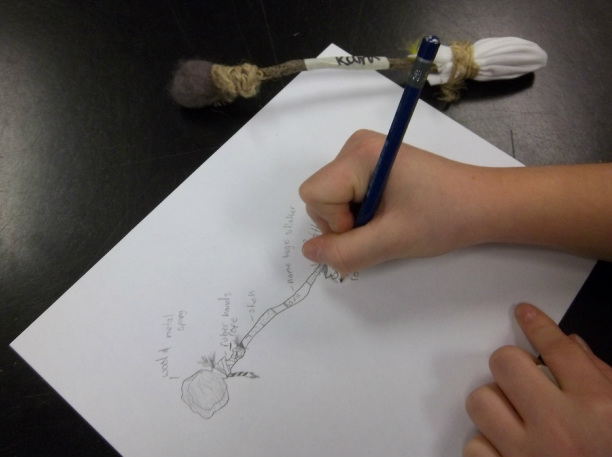 It is wonderful to see what materials went into each brush. 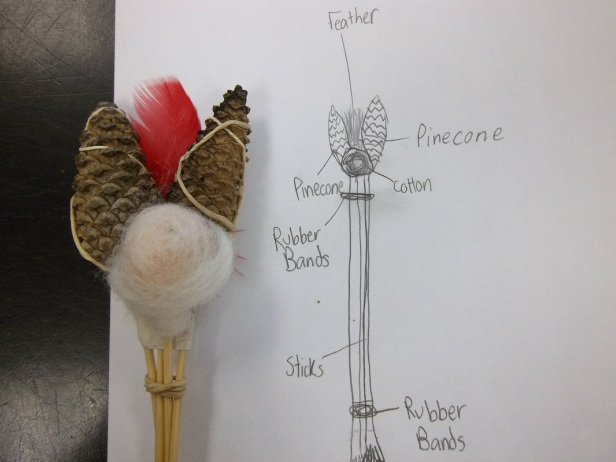 The observational drawings looked great next to the creative paintbrushes. 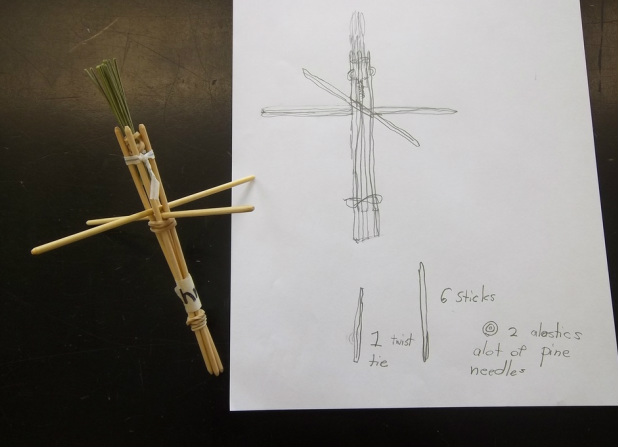 Some of the paintbrushes were designed and crafted very carefully. 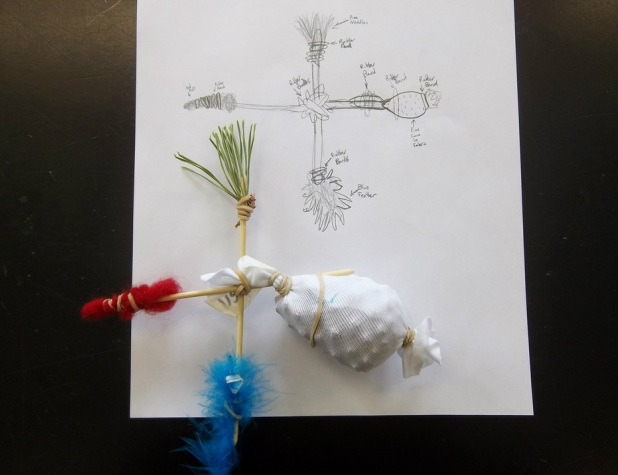 Some of the paintbrushes had four or more sides! The students loved making their own paintbrushes and are super excited to paint with them next week. Stay tuned!
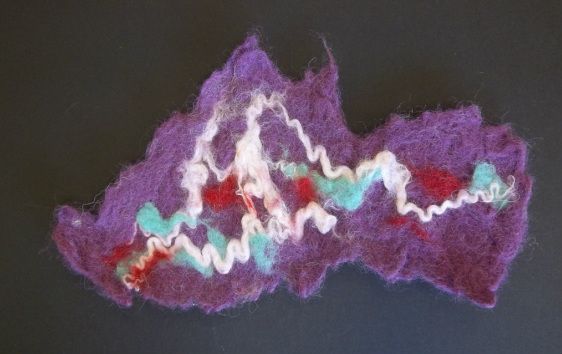
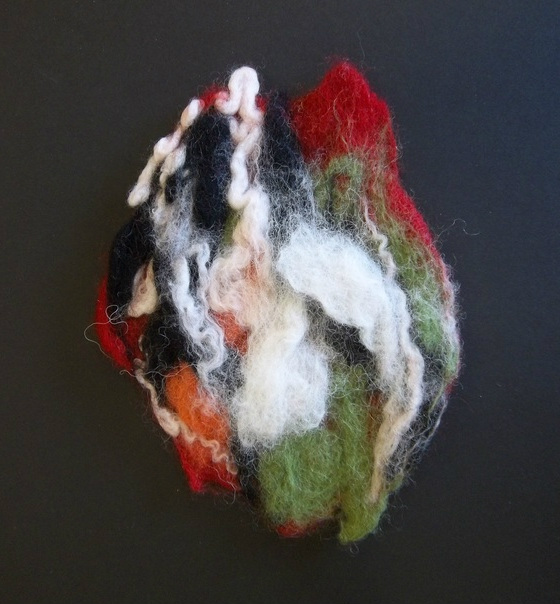
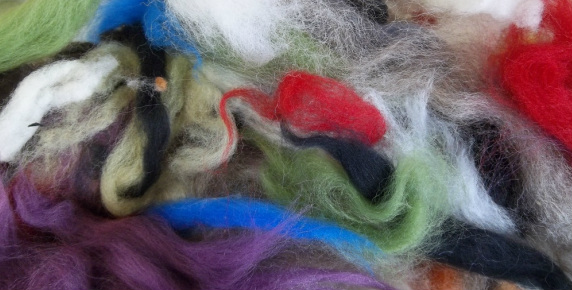
We just wrapped up a wonderful first week of K-2 felting at Poland Community School! I used my Feeling Out Wet Felt lesson that you can find here: /feeling-out-wet-felt.htmlThe students were introduced to the topic of felt last week with an informational slide show on the history and applications of felt. Students discussed sources of wool, how felt is made, and the practical and fine arts applications of felt. Students were also shown a beautiful Youtube video demonstrating the traditional Mongolian process for felt making: This week, students were taught the step-by-step process for making felt. They learned that clean un-spun wool is called roving, and they learned how to carefully pull off small thin sections needed for felting. Students learned how to lay down at least two alternating layers of wool roving, they were taught why water and soap help the felting process, and how to carefully roll up their felting mat. Students then learned how to roll and agitate their wool in order to turn it into felt, and how to test the felting progress in a piece of wool.
After the demonstration, students set to work making their own creative pieces of felt: 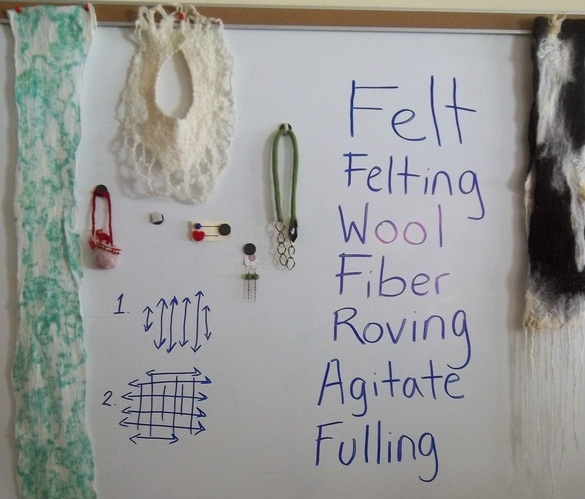 Vocabulary and examples of different felt applications were available on the board.  Here is the classroom set-up for felting- a detailed poster on the right helps students who need a reminder of the steps. 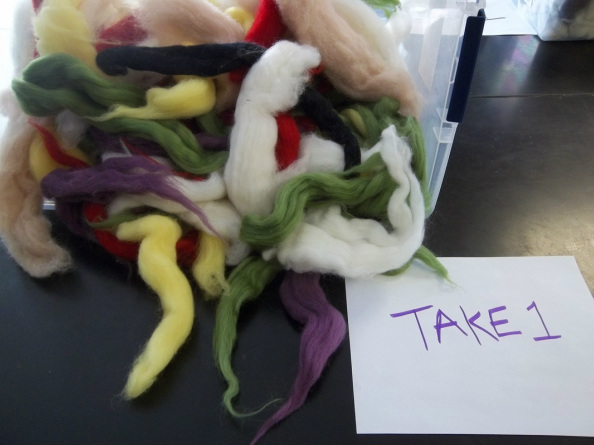 Felting requires wool roving (above), soap, warm water, and a textured felting surface.  Here is a piece of felt after one class. The results were amazing! Next week students will spend another class agitating their wool with warm soapy water; the fibers will interlock even more creating strong pieces of felt. The kids love the process and can't wait to bring home their creations. It makes me so happy to share my excitement and love for felting.
Stay tuned for more gorgeous examples of K-2 felt!
|


 RSS Feed